Announcement

Collapse
No announcement yet.

Removing Repairing Replacing tyres

Collapse
X
 
  • Filter
  • Time
  • Show
Clear All
new posts

  • Removing Repairing Replacing tyres

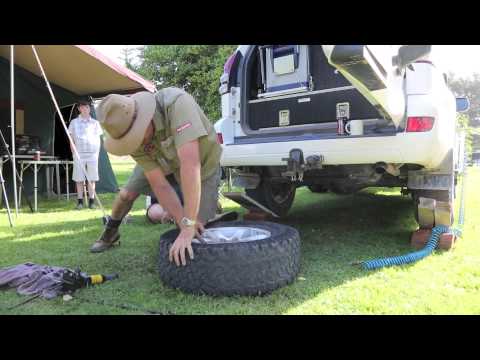
    I have told a few people that I would do a bit of a how to on removing and replacing tyres from an alloy rim. As I had a puncture to repair I’ll add that as well.

    The skills required to do this are minimal but its best you try at home first if you have never done this before, in the bush isn’t the best place to learn. Its also best in the bush to do this on a tarp to keep things clean.

    In this instance I am removing the tyre and repairing it and replacing the same tyre, so in order to keep the wheel balance correct I need to mark the position of the valve so I can replace the tyre in exactly the same rotation. If you have nothing to mark it with you can just make a note of any mark on the tyre the valve lines up with, in this case the 5 in the 265, also I know I have the white lettering “in” so I can get it back on the right way round.


    I also needed to locate the puncture, a combination of listening and some soapy water in a spray bottle found it very easily. The soapy water (dish detergent) will also come in very handy down the track. I then marked it so I can find it after the tyre is removed.


    If you look closely you can see the bubbles from the leak.

    After removing the valve it is time to break the bead. There are a few ways to do this but I use the bead breaker I designed and made that fits on the OE Toyota jack. Have a look here for more details on that http://www.pradopoint.com/showthread...e-Bead-Breaker


    And here is a video of me breaking a bead at the 2012 GTG


    Cheers Andrew
    AJ120
    Out of control poster!
    Last edited by AJ120; 15-07-2014, 04:30 PM.
    [COLOR="#FF0000"]So Long and Thanks for all the Fish![/COLOR]

    [url=http://www.4wdadventurers.com/showthread.php?3840-AJ-s-120-Prado]MY PRADO AND DIY CAMPER TRAILER[/url]

    [url=http://www.4wdadventurers.com/showthread.php?3975-AJ-s-79-series-Cruiser-Ute]MY HZJ79 Landcrusier[/url]


    [SIGPIC][/SIGPIC]

  • #2
    removing the tyre

    Once your bead is broken both sides it’s time to remove the tyre. You need some form of lubrication when doing this, I use dishwashing detergent and water in a spray bottle as I usually have all those things in the bush. When it comes to lubrication you can’t have too much, apply it liberally and often, if in doubt add more.

    You will also need some tyre levers, get decent ones, mine are a bit over 600mm long, the short ones are good for bikes but not for car tyres. I store my levers in some foam pipe insulation in the back of the Prado to stop them rattling and to save them marking the interior plastic.


    In order to protect the alloy wheels I use some short pieces of 19mm poly hose, really cheap and if you have ever put in garden irrigation you are bound to have a few off cuts, cut them a couple of inches long and then slice one side lengthways so they fit over the rims edge. Put 2 bits of poly over the rim edge around 4 inches or so apart, apply lubrication liberally around the edge, insert the levers and pull both at the same time to start removing the tyres.


    Note in the first picture that I have my foot on the opposite side of the tyre, it’s very important that you put downward pressure on that side of the tyre in order to keep the tyre on the narrow part of the rim.

    Remove one of the tyre levers and move it around a little way, also move the poly pipe or grab another piece if it’s hard to remove the previous one. You need to take small bites at the tyre to start, so after inserting the tyre lever in an easy spot you can tap it back with a rubber mallet to make the bite a bit smaller as in the pictures below.


    Continue doing the same around the tyre, after a couple of times you can increase the spacing and it will get easier, by around half way you can just pull the rest off with your hand.

    I should add that it is generally easier to remove the tyre off the front of the rim than the rear, as I have done in these pics.

    To remove the second side once again use the poly pipe and this time one tyre lever. With truck tyres I can use 2 levers and just flick the tyre of with one movement but that doesn’t seem to work on smaller tyres. Once again use lubrication liberally and then pull on the lever and hit the bead of the tyre with a rubber mallet moving from side to side on the tyre, keep going until the tyre comes completely off.


    Cheers Andrew
    AJ120
    Out of control poster!
    Last edited by AJ120; 15-07-2014, 04:34 PM.
    [COLOR="#FF0000"]So Long and Thanks for all the Fish![/COLOR]

    [url=http://www.4wdadventurers.com/showthread.php?3840-AJ-s-120-Prado]MY PRADO AND DIY CAMPER TRAILER[/url]

    [url=http://www.4wdadventurers.com/showthread.php?3975-AJ-s-79-series-Cruiser-Ute]MY HZJ79 Landcrusier[/url]


    [SIGPIC][/SIGPIC]

    Comment


    • #3
      Repairing the tyre

      In my case I am repairing a puncture so I will go onto that now.
      I am using a mushroom patch for the repair which is generally considered the best method for a small puncture like this. Check the mark on the outside of the tyre and look inside in that same spot and locate the puncture. In this case I could easily see a small split about 2mm long but the photo I took didn’t show anything. Use a drill to drill an appropriate sized hole (depending on the size patch you have) through the tyre, in this case a 6mm hole.


      You will obviously need a patch, something to rough up the inside of the tyre (sandpaper in this case) some glue and a patch roller.


      After roughing up the area where the patch will go and removing the (blue) plastic cover from the patch and stem I add a generous amount of glue to the area around the hole including squeezing a bit into the hole, spread it around using my finger and wait a few moments for it to start to go tacky. Push the wire end of the mushroom patch through the hole, grab it on the outside of the tyre with some pliers and pull it through, then get to work rolling the patch with your patch roller, just like you did as a kid fixing flats on your bike


      Once you are happy with the repair just cut the wire and excess rubber stem off.
      AJ120
      Out of control poster!
      Last edited by AJ120; 15-07-2014, 04:38 PM.
      [COLOR="#FF0000"]So Long and Thanks for all the Fish![/COLOR]

      [url=http://www.4wdadventurers.com/showthread.php?3840-AJ-s-120-Prado]MY PRADO AND DIY CAMPER TRAILER[/url]

      [url=http://www.4wdadventurers.com/showthread.php?3975-AJ-s-79-series-Cruiser-Ute]MY HZJ79 Landcrusier[/url]


      [SIGPIC][/SIGPIC]

      Comment


      • #4
        Replacing the tyre

        Putting the tyre back on. Making sure you have it the right way round (white letter in for me) add plenty of lubrication once again and push the tyre on, use your knee to push it on as far as you can, then use the rubber mallet once again hitting directly on the edge of the bead to tap the rest of it on.


        Use a similar method for the second side but this time I stand on it and push it on with my heels as far as I can, then use the mallet again. Don’t forget Lubrication


        Cheers Andrew
        AJ120
        Out of control poster!
        Last edited by AJ120; 15-07-2014, 04:40 PM.
        [COLOR="#FF0000"]So Long and Thanks for all the Fish![/COLOR]

        [url=http://www.4wdadventurers.com/showthread.php?3840-AJ-s-120-Prado]MY PRADO AND DIY CAMPER TRAILER[/url]

        [url=http://www.4wdadventurers.com/showthread.php?3975-AJ-s-79-series-Cruiser-Ute]MY HZJ79 Landcrusier[/url]


        [SIGPIC][/SIGPIC]

        Comment


        • #5
          Inflating the tyre

          People seem to really worry about seating a bead with a small compressor, but here’s a few ways to go about it that will help. Assuming as I have that you have removed and replaced the same tyre, chances are it will pump up without much trouble at all using a 12v compressor. Just make sure that when you try and pump it up that you stand the tyre upright, adding a bit of downward pressure with your knee or elbow will also help. Don’t forget lubrication!


          If that doesn’t work and you think a bit more volume of air would do the trick then use another tyre as a tank. I previously had a tank mounted on my first Prado and found it a waste of time, a spare tyre does a good job and is much larger than any tank you could fit.
          Anyway best to use a tyre not on the vehicle or as in the picture below support the vehicle on a jack, pump up the “tank” tyre to a high pressure, taking note of the maximum inflation pressure marked on the tyre, 60-70psi is probably OK on most tyres. Make sure you carry around 1.5 meters of 8mm air hose. With the valve removed from your repaired tyre place one end of the hose over the valve stem, then remove the valve from the inflated tyre and quickly put the other end of the hose over the open valve stem. This should give you a full blast of air from a large tank, make sure you keep the tyre upright and once again adding downward pressure may help.


          If that still fails then I carry a 16” bicycle tyre, add just enough air so that its round then stretch it over the rim so it sits between the rim and the tyre, also place a strap around the tube for removing it. There is a bit of an art to timing this correctly but start inflating the tyre, the bike tyre will seal things up but you need to pull on the strap at just the right time so as to be able to not get it jammed; but also leave it long enough so the bead has “caught” I’ve done this hundreds of times on truck tyres so like most things you might need a bit of practice.


          If unlike my effort here you were replacing the tyre with a different tyre you had been carrying then it is quite likely that the tyre will be a little squashed and this would make seating the bead difficult, all the above techniques should help but here’s one more.
          This works best when it’s hot. Before you even start removing the old tyre get your carcass out and find something to spread the bead, make sure it’s not something that will damage the bead, below I have showed a few option you might have. Your jack, my ARB plug kit case and a piece of firewood, anything will do. Just put 3-5 of these around the tyre spreading the bead as much as possible and leave it in the sun while you do your other work.


          Two other options that I would NOT recommend are.
          Wrapping a ratchet strap around the tyre, if you over inflate the tyre before removing the strap, it can break and you have yourself a missile.
          Using a flammable liquid or spray to explode the tyre back on. Apart from the initial danger and the possible damage to either the rim or the tyre you might like to google “pyrolysis” Basically it’s a heating up inside the tyre that can lead to overheating and the tyre exploding, minutes, hours or even sometimes days later.

          Cheers Andrew
          AJ120
          Out of control poster!
          Last edited by AJ120; 15-07-2014, 04:45 PM.
          [COLOR="#FF0000"]So Long and Thanks for all the Fish![/COLOR]

          [url=http://www.4wdadventurers.com/showthread.php?3840-AJ-s-120-Prado]MY PRADO AND DIY CAMPER TRAILER[/url]

          [url=http://www.4wdadventurers.com/showthread.php?3975-AJ-s-79-series-Cruiser-Ute]MY HZJ79 Landcrusier[/url]


          [SIGPIC][/SIGPIC]

          Comment


          • #6
            Just a couple of tips to ad to AJ's excellent post , i did this for 16 years so i learnt a thing or 2 , if you are having some trouble getting the beads to seal , give the tyre a good bounce with the air flowing in , most time this will do the job
            the 1 thing though with the glue is that is needs to be dry before you insert the plug , never touch any part of the plug that is going to be glued in with your fingers also just put a tiny smear of glue onto the shaft of the plug before you pull it through , makes a world of difference
            2012 Graphite GXL T/D Auto, with all the normal crap you fit

            Comment


            • #7
              AJ, You forgot about the final testing where you drive furiously up a large sand dune to ensure the tyre is properly secure on the rim.
              Dave
              Views expressed are mine alone and are not intended to compromise the integrity of my employer nor offend those who may read such views.
              Bugger Bali, get out and see Australia before we sell it all to China.

              Comment


              • #8
                Originally posted by Bear63 View Post
                Just a couple of tips to ad to AJ's excellent post , i did this for 16 years so i learnt a thing or 2 , if you are having some trouble getting the beads to seal , give the tyre a good bounce with the air flowing in , most time this will do the job
                the 1 thing though with the glue is that is needs to be dry before you insert the plug , never touch any part of the plug that is going to be glued in with your fingers also just put a tiny smear of glue onto the shaft of the plug before you pull it through , makes a world of difference
                Yep bouncing the tyre is a good option, I've mostly done Truck tyres so not overly keen on lifting them

                Cheers Andrew
                [COLOR="#FF0000"]So Long and Thanks for all the Fish![/COLOR]

                [url=http://www.4wdadventurers.com/showthread.php?3840-AJ-s-120-Prado]MY PRADO AND DIY CAMPER TRAILER[/url]

                [url=http://www.4wdadventurers.com/showthread.php?3975-AJ-s-79-series-Cruiser-Ute]MY HZJ79 Landcrusier[/url]


                [SIGPIC][/SIGPIC]

                Comment


                • #9
                  Originally posted by Bushbasher View Post
                  AJ, You forgot about the final testing where you drive furiously up a large sand dune to ensure the tyre is properly secure on the rim.
                  That is an alternate method of breaking the bead

                  Cheers Andrew
                  [COLOR="#FF0000"]So Long and Thanks for all the Fish![/COLOR]

                  [url=http://www.4wdadventurers.com/showthread.php?3840-AJ-s-120-Prado]MY PRADO AND DIY CAMPER TRAILER[/url]

                  [url=http://www.4wdadventurers.com/showthread.php?3975-AJ-s-79-series-Cruiser-Ute]MY HZJ79 Landcrusier[/url]


                  [SIGPIC][/SIGPIC]

                  Comment


                  • #10
                    Great tutorial.
                    Terry
                    Canberra
                    2008 Prado 120 D4D and 2010 Jayco Swan Outback

                    Comment


                    • #11
                      Had to fix the TPMS sensors as two failed. Thought i would do a picture thing but see Andrew has done a really great job.
                      On some of these pics you can see the TPMS sensors that failed from new. Of the 13 i have only two of the last batch needed renewing.

                      Lube with soapy water.


                      Mark the valve stem


                      Tyre pliers, take your time with this.


                      Same with the back bead.


                      Insert the levers. Care full not to damage the mag. Push the other side of the tyre into the middle.

                      Work your way around the tyre, small bits at a time.


                      TPMS sensor.


                      Now the hard bit. Mud tyres have a much thicker sidewall the the All Terrains.


                      The last bit be carefull not to knock the sensor.


                      Pump it up and away we go.

                      08 VX D4D, Lift, Safari Snorkle, Trailblazer Fridge, Custom Storeage System, BFG, ARB Safari Bar, Wife, Kids, Codan NGT HF Radio, Debt.
                      06 100 Series Sahara, Bilteins, Kings, Beaudesert 3", Diff drop, Unichip Q4, Safari Intercooler, EGR delete, 20ft Bushtracker, Codan Envoy more coming.
                      Sometimes i wake up Grumpy, most times i leave her sleep.

                      Comment

                      canli bahis siteleri bahis siteleri ecebet.net
                      mencisport.com
                      antalya escort
                      tsyd.org deneme bonusu veren siteler
                      deneme bonusu veren siteler
                      gaziantep escort
                      gaziantep escort
                      asyabahis maltcasino olabahis olabahis
                      erotik film izle Rus escort gaziantep rus escort
                      atasehir escort tuzla escort
                      sikis sex hatti
                      en iyi casino siteleri
                      deneme bonusu veren siteler
                      casibom
                      deneme bonusu veren siteler
                      deneme bonusu veren siteler
                      betticket istanbulbahis
                      Working...
                      X