Announcement

Collapse
No announcement yet.

90 Series Prado Build Up!

Collapse
X
 
  • Filter
  • Time
  • Show
Clear All
new posts

  • 90 Series Prado Build Up!

    Mods on the wish list
    -Bull Bar - Ordered, still need to fit
    -RoofRack - Ordered, still need to fit
    -Winch - Ordered, still need to fit
    -41" LED light bar
    -2" Lift
    -32" BFG KM2
    -GME UHF Radio- Ordered, still need to fit
    -Diff Breathers- Done
    -Dual Battery system
    -Rear Led Work light
    -Custom Drawer system with Fridge Slide
    -Snorkel - Ordered, Still need to fit


    Gday People

    I got my 90 Series Toyota Prado Dead Stock, First things i put on was An ARB Touring Simpson 3 Rooftop Tent, ARB Awing and a Roof Basket on.

    Click image for larger version

Name:	IMG_0088.jpg
Views:	1
Size:	95.3 KB
ID:	659325

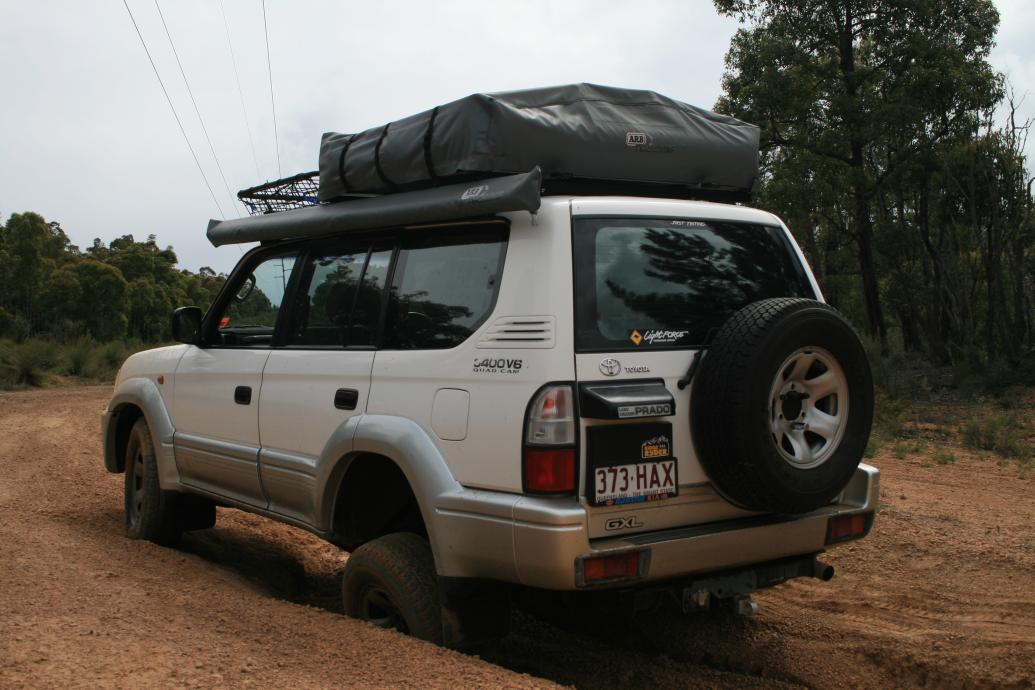
    Now im bored of this set up and need something where i can mount LED lights, So i ordered a Rooftop Tent Roof Rack online the other day and should be here in 2-3 weeks, so for now i took the Rooftop tent and awning off so when the roof rack
    comes i can mount it straight away.

    Click image for larger version

Name:	IMG_2908.jpg
Views:	1
Size:	95.4 KB
ID:	659326

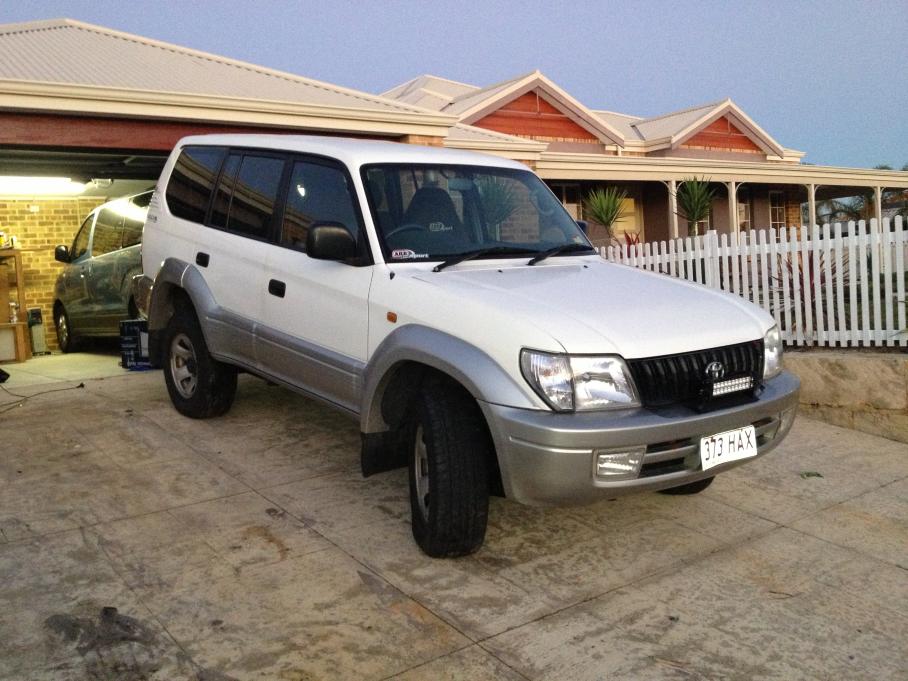
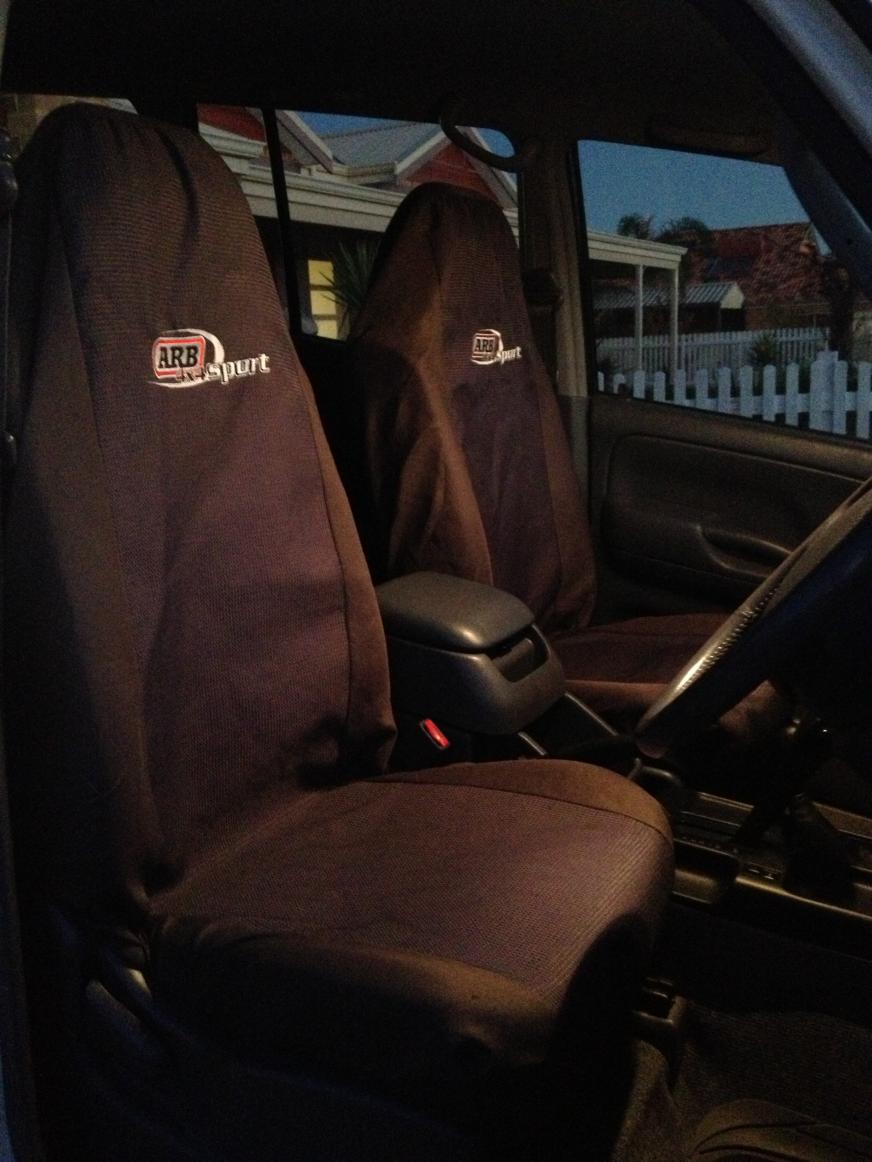
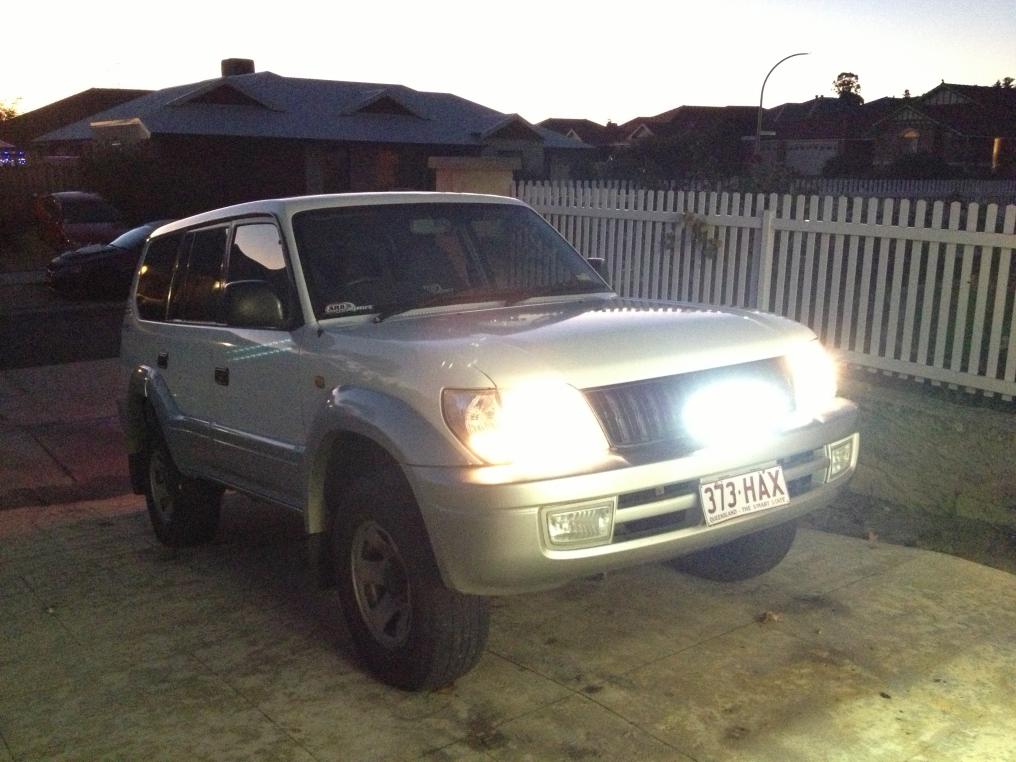
    I put a 12" LED light bar on the front for now until i get a bull bar, and i got some 9" 75w HID Spot lights, as well as some ARB Seat covers.

    Click image for larger version

Name:	IMG_2859.jpg
Views:	1
Size:	95.9 KB
ID:	659327Click image for larger version

Name:	IMG_2910.jpg
Views:	1
Size:	99.2 KB
ID:	659328Click image for larger version

Name:	IMG_2911.jpg
Views:	1
Size:	95.1 KB
ID:	659329


    Heres a video of when i went for a quick 4wd on the weekend ( Please Click on Link here - http://www.youtube.com/watch?v=TbMG2RW01bI )
    Stefan4x4
    Junior Member
    Last edited by Stefan4x4; 16-06-2013, 08:16 PM.

  • #2
    Alright, ive picked up some New things today it was time to upgrade my recovery kit so went and picked up some things.

    Recovery Gear --

    -ARB Recovery bag
    -2 Snatch Straps
    -Tyre defeaters
    -2 3.8 Ton D shackles
    -Tow bar recovery point
    -2 pairs of XTM Recovery Gloves


    GME TX670 Hand held Radio and a GoPro 3 Black Edition.

    Click image for larger version

Name:	IMG_2914.jpg
Views:	1
Size:	94.8 KB
ID:	644410

    Heres some more pics of the Recovery kit-

    Click image for larger version

Name:	IMG_2915.jpg
Views:	1
Size:	95.9 KB
ID:	644411Click image for larger version

Name:	IMG_2918.jpg
Views:	1
Size:	95.0 KB
ID:	644412Click image for larger version

Name:	IMG_2926.jpg
Views:	1
Size:	96.7 KB
ID:	644413Click image for larger version

Name:	IMG_2927.jpg
Views:	1
Size:	95.3 KB
ID:	644414
    Stefan4x4
    Junior Member
    Last edited by Stefan4x4; 03-06-2013, 08:07 PM.

    Comment


    • #3
      The TX670 is a great radio

      Click image for larger version

Name:	IMG_2923.jpg
Views:	1
Size:	95.4 KB
ID:	644415

      I got a GoPro 3 to film all my 4wd trips i mounted it on the Windscreen - its Awesome and its very small so it can fit where ever you basically want

      Click image for larger version

Name:	IMG_2929.jpg
Views:	1
Size:	89.4 KB
ID:	644416Click image for larger version

Name:	IMG_2930.jpg
Views:	1
Size:	89.4 KB
ID:	644417Click image for larger version

Name:	IMG_2924.jpg
Views:	1
Size:	95.6 KB
ID:	644419

      Got a Tow Bar Recovery Receiver too.

      Click image for larger version

Name:	IMG_2933.jpg
Views:	1
Size:	95.1 KB
ID:	644418

      Comment


      • #4
        Today i was wondering about a Fire Extinguisher, i went out and got a small one to install in the Foot well - Here is some pics of it fully installed
        Click image for larger version

Name:	IMG_2934.jpg
Views:	1
Size:	90.3 KB
ID:	644420Click image for larger version

Name:	IMG_2935.jpg
Views:	1
Size:	89.8 KB
ID:	644421Click image for larger version

Name:	IMG_2936.jpg
Views:	1
Size:	90.9 KB
ID:	644422Click image for larger version

Name:	IMG_2939.jpg
Views:	1
Size:	91.0 KB
ID:	644423

        Comment


        • #5
          Your fire extinguisher is well placed. (Much better than mine, which is shoved under the passenger seat)

          Comment


          • #6
            Yeah i also tried it there but its no good to hard to access

            Comment


            • #7
              Fire extinguisher will fit just in front of driver's seat across the car.
              Michael and Kelly

              [SIZE=1]1999 Prado Snowy 3.4L petrol, Ultimate Suspension 50mm lift (2013)[/SIZE][SIZE=1], BFG A/T, bull bar, winch, Twine hot water shower, home made rear drawers, Shippshape car top tent, UHF radio, tablet GPS & Navman GPS (both running OziExplorer)[/SIZE][SIZE=1], Spot 1, solar panel, second battery, inverter, Engel fridge and more[/SIZE]

              Comment


              • #8
                Front Diff Breather
                Needed some Diff Breathers in the Car, went out and got all the Stuff needed Cost me about $20 - $30

                Parts -

                -1/4" Male barbed brass hose fitting
                -1/8th BSP - 1/4" Male brass hose fitting
                - Cable Ties
                -1/4" Fuel Hose
                -2x Fuel filter
                -Hose clamps

                Click image for larger version

Name:	IMG_2945.jpg
Views:	1
Size:	89.3 KB
ID:	644433


                I only got around to fitting the Front Diff Breather today i was to busy to fit the back one, The Rear one should be completed by next weekend

                You first pull out the old Diff breather and then put in the New brass Hose fitting with a Hose clamp around it.

                Click image for larger version

Name:	IMG_2947.jpg
Views:	1
Size:	87.5 KB
ID:	644434

                Now that you done that you fit the Fuel Line to the other side of the Brass plug and put a Hose Clamp around it.

                Click image for larger version

Name:	IMG_2948.jpg
Views:	1
Size:	82.3 KB
ID:	644435


                Now Just take the Fuel line all the way up where you want it, put the Fuel Filter on it and then cable tie the Fuel Hose down onto the car.


                Click image for larger version

Name:	IMG_2954.jpg
Views:	1
Size:	90.0 KB
ID:	644436
                Stefan4x4
                Junior Member
                Last edited by Stefan4x4; 09-06-2013, 01:05 PM.

                Comment


                • #9
                  Originally posted by Stefan4x4 View Post
                  Yeah i also tried it there but its no good to hard to access

                  Agree, I've just been too slack to fit it up properly.

                  Comment


                  • #10
                    Rear Diff Breather

                    Ok, Finally got around to installing the rear diff breather today
                    I just run the fuel hose from the back diff up into the engine bay.

                    here is some pics -

                    Click image for larger version

Name:	IMG_2970.jpg
Views:	1
Size:	92.3 KB
ID:	644531

                    Comment


                    • #11
                      Click image for larger version

Name:	IMG_2971.jpg
Views:	1
Size:	86.0 KB
ID:	644532Click image for larger version

Name:	IMG_2972.jpg
Views:	1
Size:	93.8 KB
ID:	644533

                      Both Diff Breathers up in the engine bay

                      Click image for larger version

Name:	IMG_2973.jpg
Views:	1
Size:	86.2 KB
ID:	644534

                      Comment


                      • #12
                        Alright, got around to ordering a Powerful 4x4 Premium winch Bullbar, and The Rooftop Tent Rack , and also a snorkel, The bullbar and roofrack should be here sometime July and the snorkel next week

                        Comment


                        • #13
                          Keep up the mods mate, the 90's are a fantastic 4x4
                          glen_ep - engineered, 4" lift, 33" 255/85R16, lockers, 4.88 ratios www.pradopoint.com.au/showthread.php?17237 www.youtube.com/user/glenep www.fb.com/groups/ToyotaPrado90

                          Comment


                          • #14
                            cheers man, Yeah they are really good, love mine to bits

                            Comment


                            • #15
                              Finally Received my Snorkel today! should be fitting it up this weekend cant wait!

                              Click image for larger version

Name:	IMG_3038.jpg
Views:	1
Size:	98.0 KB
ID:	644658

                              Comment

                              canli bahis siteleri bahis siteleri ecebet.net
                              mencisport.com
                              antalya escort
                              tsyd.org deneme bonusu veren siteler
                              deneme bonusu veren siteler
                              gaziantep escort
                              gaziantep escort
                              asyabahis maltcasino olabahis olabahis
                              erotik film izle Rus escort gaziantep rus escort
                              atasehir escort tuzla escort
                              sikis sex hatti
                              en iyi casino siteleri
                              deneme bonusu veren siteler
                              casibom
                              deneme bonusu veren siteler
                              deneme bonusu veren siteler
                              betticket istanbulbahis
                              Working...
                              X