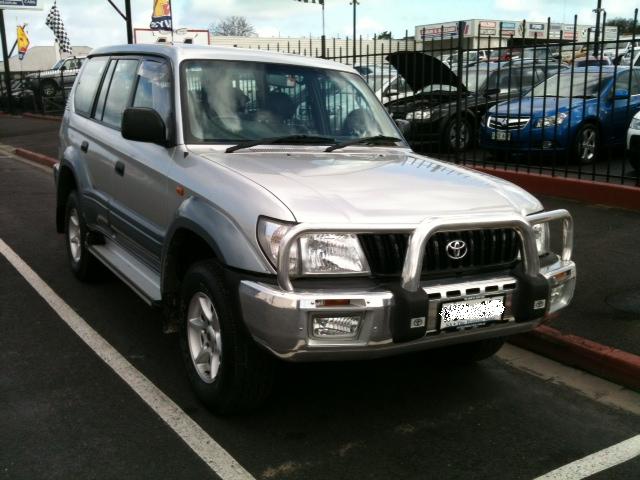
Announcement
Collapse
No announcement yet.
Snoopy22 - 95 Series
Collapse
X
-
G'day Folks,
Well looks like my photo worked, now I know I can transfer at the next size up so its easier to see.
First purchase was a steering wheel cover and some deep dish rubber mats. SmallI know but it makes life easier for day to day driving and cleaning.
Finding the steering wheel cover was an interesting exercise. It would appear that most cars have 15" or 17" steering wheels. My 95 is 16" and as the leather is just starting to deteriorate I started looking. I managed to find one which seems to do the job (Sunland by Haigh). I think looking for advice re covers was one of my first questions on PP.
Next purchase was window tinting all round, keeps the car much cooler and improved the look to boot. Photo to follow.
-
G’day Folks,
As with most touring families I was after a storage solution to accommodate all of my kit (and potential kit yet to be purchased). I considered numerous options including purchasing drawers. Apart from the fact that they are out of my budget, I wanted something that provided me with flexibility with regard to my storage configuration and more importantly didn’t weigh a ton.
The solution for me was to customise a lightweight system. I got the idea for this system from my father-in-law who has an old GQ Patrol (Nissan …spit, civil war in the family now :-I ). He’s had his system for over 10 years and it works quite well. As with any good assignment I took his idea and improved it.
Anyway the concept picture is below.
I’ve divided the space into two assemblies (lower and upper) I use the lower assembly for day trips and general running around (also good for the dog to sit on) while the upper assembly will be inserted for weekends and longer touring activities.
I plan to use heavy duty plastic tubs instead of drawers to hold items. These can be inserted and removed as required and will be located under / between the shelves. They are also good for taking items outside when camped for the night.
The lower assembly essentially comprises of 19mm steel box tubing welded into four rectangular frames, a slab of 19mm MDF cut to size for the shelf and topped with some outdoor carpet. These can be bolted together (via stainless nuts and bolts) and unbolted and flat packed away in my garage as required. I removed the third row of seats and have the lower shelf mounted to the frame to support the middle of the shelf and seat mounts to support the edges. After testing i.e placing my fat ar#e on it, I figure it can hold a fair bit of weight without any issue.
To date I’ve finished the first phase and I’m waiting until I get a fridge slide before commencing the second phase. That way I can make sure I make to most out of the available space.
Comment
-
Looks very good, like new!
I like your storage idea. Heavy storages are not to good!
CheersPrado RZJ90. OME 881 coils Nitrocharger Sport shocks front, 80 Series front coils & rear 80 series Tokico shocks rear, 255/85R16 Cooper Discoverer ST, Viper rocksliders, parking brake cable rear axle bracket, extended rear brake line, extended diff breathers, headers, engine perfomance mods, soon LR upper control arms, ARB rear locker in the future.
Comment
-
G’day Folks,
Had a piece of aluminium fabricated and welded to the bull bar so I could mount my antenna for the UHF. The fabricator asked if I wanted a mount with two holes, said it wouldn’t cost any more so I figured why not, might come in handy for something, maybe a sand flag, hmmm something else to make, I have an old high vis vest so better put that on my list.
Comment
-
G’day Folks,
I have now mounted my UHF, some of you may have responded to my queries re cables through the firewall and power connection. Thanks for the info if you did.
My UHF is a GME 3100 and the antenna AE 4018K1 from Prestige Comms in the West. I would recommend them. I received my parcel within 24hrs of ordering it, I was expecting at least 3 days so was stoked when it rocked up the next day (order processed 3pm one day arrived at the house 8am the following day).
I considered mounting the unit in numerous locations, but when I actually placed the unit in them to see how they would look they didn’t work for me because of its small size.
I considered the spot where the previous owner had his radio fitted (in the recess / compartment at junction of dash and centre console) this was too far away to read the display and access the buttons. Next was on the side of the centre console, this was too messy and I had to look down to read and play with it, same for under the dash. I considered inside the centre console but this would mean I required an external speaker plus I was too tight to buy one given the unit has a speaker built in.
After reading a heap of forum threads and seeing other folk’s suggestions I settled for mounting mine on top of the steering column. Easy to read, easy to access controls and the speaker is at a good height with the instrument cluster also acting as a sounding box type amplifier (if there is such a thingy).
I ran the cables through the firewall via a grommet located above the accelerator in the right hand side foot well. This provided the shortest route to both my antenna and battery. I wired the power directly to my second battery so I can operate the radio when the ignition is off (thanks for the suggestion).
Comment
-
G’day Folks,
I’ve created a cheap, practical and flexible (in terms of use not construction) table for the back of the 95.
I made it out of 10mm bait board (400 x 900), some spare shower screen channel salvaged from the outlaws bathroom makeover, a coat hanger, cord and a rubber end for a chair leg.
Coincidently the bait board fits snugly into the channel so no rattling (most important). I mounted the channel under the shelf of my lower storage assembly (see earlier entry). I can slide the board out part of the way for a self supporting small table/shelf for making brews or sandwiches etc or I can pull it all of the way out for a larger work area.
I used the coat hanger to make three hooks joined by the cord. I attach two hooks to the board corners and one over the top of the rear door (hence the rubber chair stopper to prevent hanger scratches), similar principle to suspension bridge cables holding the road deck up. Surprisingly the board holds a fair bit of weight without bending. I tested it with my granite mortar and pestle (approx 22cm diameter) and it worked fine. I think the cord has a breaking strain of 100kg or something ridiculous like that.
I am also able to remove the board completely and place it anywhere around the campsite for food prep e.g on our camp table or create an additional work surface using the esky or storage crates etc.
Anyway works for me :-)
Comment
-
G'day Folks,
Made a few posts today which brings me more or less up to date.
Next task - front recovery points, from what I've read this should be quite interesting. Need to get under the car and see if it will be an easy or not so easy job.
Also investigating a roof rack, currently considering Kaiser 2.2m steel cage or Windcheetah 2m alloy platform. Hugh difference in price approx $700 so need to think about this some more.
Firdge slide is also on the cards prior to Christmas
Comment
-
Well...it would appear that getting rate recovery points for the front of my car isn't going to be an easy task, the issue here is that I have a factory front bull bar and the tie down points are integrated into the bar mount, additionally I dont think anyone stocks recovery points to cover this situation. Looks like I will have to get something made.
I would be interested to know how other folks with factory bull bars on 95 Prados resolved the issue without changing out the bar.
Snoopy :-(
Comment
-
After researching forums other websites and speaking with PP members and 4x4 accessory providers it became increasingly evident that obtaining recovery points for my 95 Series with OME alloy bar wasn't going to happen.
Initially I was going to bolt a custom flat point to the side of the existing tie downs (higher up) (there is another thread showing a mock-up of the design. After some further discussions it was decided the best option would be to utilise the current chassis anchor points and also use the existing structure as additional bracing material.
As a result I made some custom points. I used a 200mm off cut of 150 x 150 structural steel.
I cut this down to two 85 lengths of 40 x 100 drilled 4 holes into each; two to receive longer bolts to mount into the existing chassis locations, one to tie the new points to the side of the current structure and a 30mm hole to accommodate a shackle.
Fitting the points was tight and slow took some fine tuning to get the bolts locked up nice and tight but at the end of the day all was OK. I also removed the old tie down points to make room
For those interested I've attached a couple of pictures.
Snoopy
Comment
Comment