Announcement

Collapse
No announcement yet.

Mikes 150VX - Yes, it's another silver Prado

Collapse
X
 
  • Filter
  • Time
  • Show
Clear All
new posts

  • Mikes 150VX - Yes, it's another silver Prado

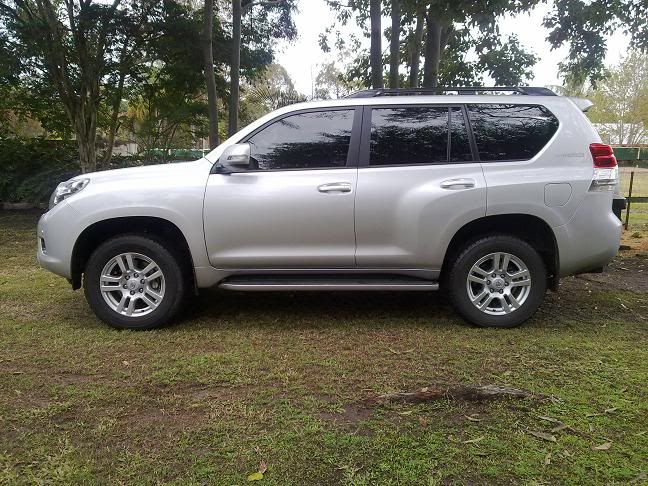
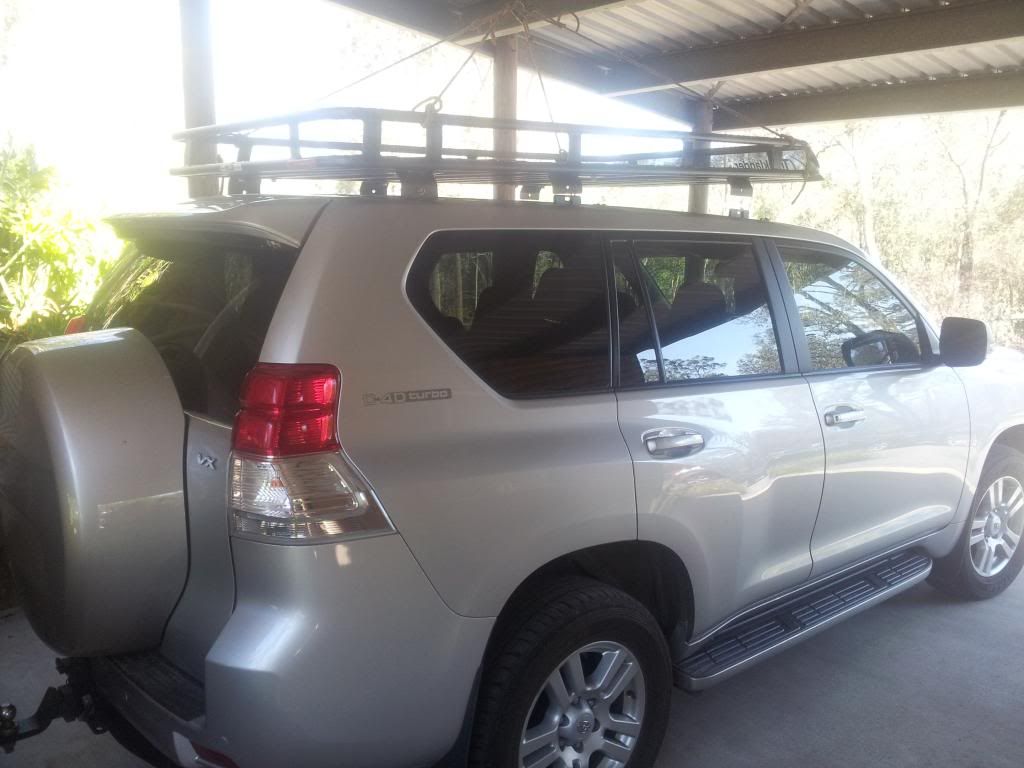
    We bought the Prado as a demo vehicle from Motorama in Salisbury back in August 2010. It came with tinted windows, Toyota rubber floor mats, and a Toyota tow bar. I wanted to start the modding process straight away but was told that we'd already dropped enough money into the car, so for two long years it stayed the same as how we'd bought it.


    Last year i thought i had a chance to put on a rear bar when my wife reversed into another car did some damage. Unfortunately the whole bumper needed replacing and the Kaymar bars are a bumper cut. It got sorted by Jimboomba Smash repairs. They were easy to deal with and did a good job.

    Earlier this year i found myself with a bit of spare cash and was keen to get rolling. I trundled along to TJM Underwood for the show day sale ready to buy a Tacklander roof rack and do some impulse shopping. I arrived shortly after opening time and wandered around for about 10 minutes without anyone acknowledging my presence. So i went on over to Cooper Plains where i was greeted as soon as i walked through the door. Salesman asked how he could help and i told him i was after a price on the Tracklander roof rack. He tells me they don't stock them. "What do you mean you don't stock them? Your website says you do, their website says you do." Apparently they haven't had them in years. I walked away without spending anything.

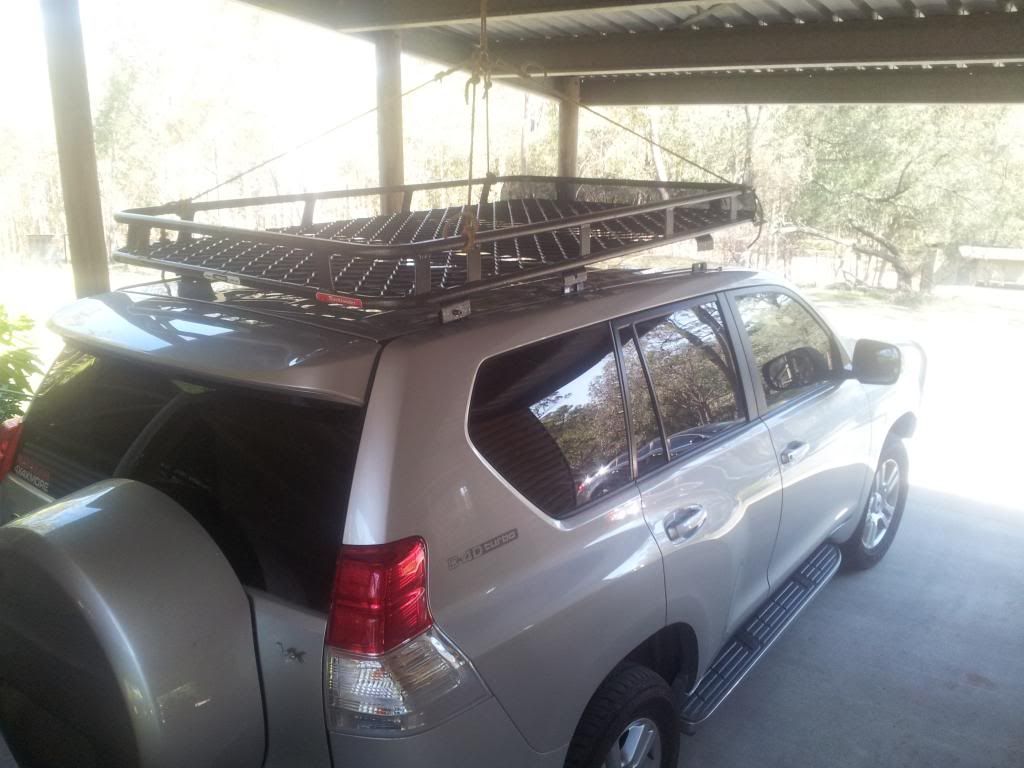
    A couple of months ago my wife drove up the back of someone and i lept at the opportunity to fit a bullbar. I'd had my eye on the T13 bar and so i sent out some email requests for quotes to supply the bar and a Tracklander roof rack. TJM Underwood and Coopers Plains were the first to get my request. Then i thought to include Brendale because Hutch keeps banging on about how good they are. The next day i got a reply from Justin at Brendale. Nothing from the other two.

    A few calls to the insurance company, Steve from Jimboomba Smash Repairs, and Justin and it was all sorted. I drove up to Brendale to collect my bar and rack and provided it to Jimboomba Smash Repairs for them to paint and fit. Steve had told me that it wouldn't be a problem, that they'd colour match the paint so i couldn't tell the difference and that they could do it all cheaper than TJM could. I didn't have any reason to doubt him; his last job had been great and delivered exactly what he said he would. I didn't have any problem with it being done at Brendale other than it being about 90 minutes away from home and i didn't want to sit around all day to wait. Much easier to take it around the corner to Jimboomba.

    I should have gone to TJM Brendale.

    The smash repairers had my bar for 4 days before i got told it would cost me $450 for painting and fitting. I was happy with that. It was about $200 less than what Justin said they'd charge. I brought my car in a couple of days later for the fitting. While i was waiting to be picked up i was told that they'd scratched the bar and they may need to repaint it. Then Steve starts moaning about how much trouble they were having. Alarm bells started ringing but i thought "he's a professional, he'll sort it out." Before i left he told me they'd need the car for the whole day, not the 5 hours originally planned.

    I got a call from wifey in the middle of the afternoon telling me she'd picked the car up and they'd charged her $495. It seems there was a "misunderstanding" about including GST in the quote. I wasn't too worried though. Still less than i would otherwise have paid.

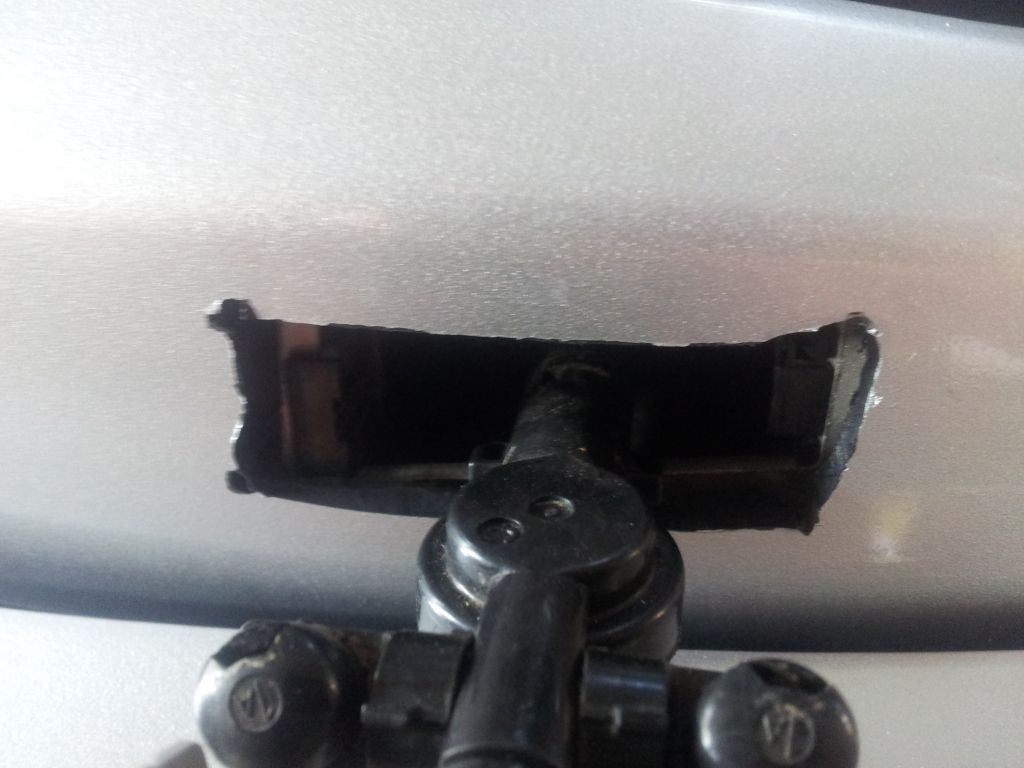
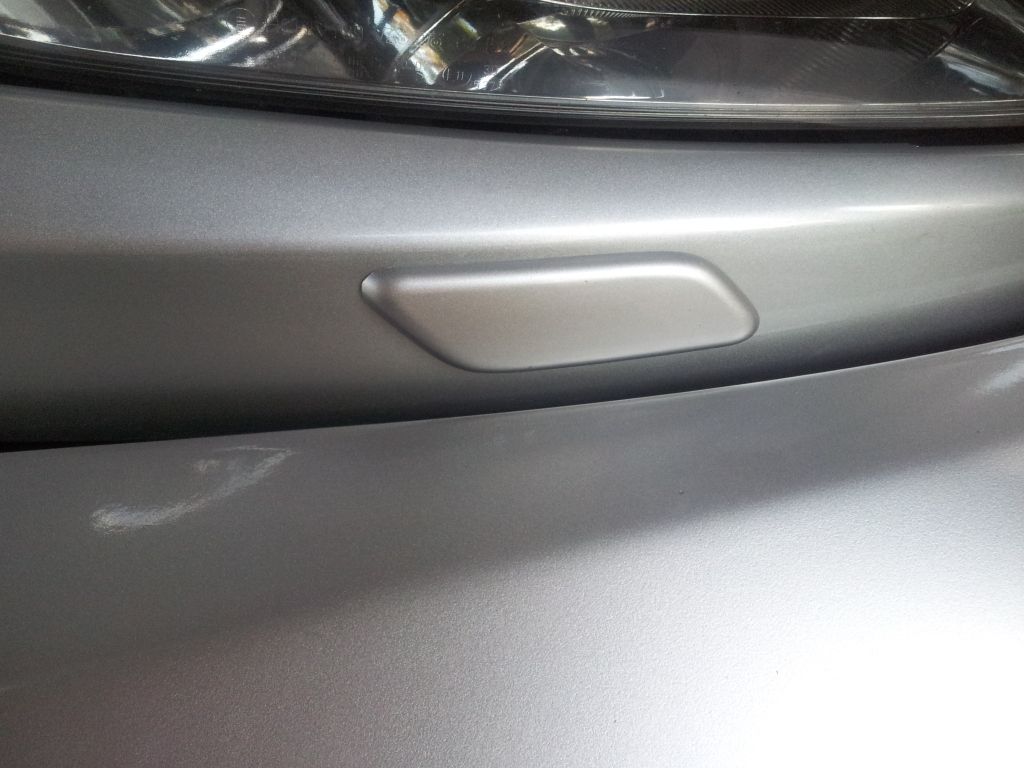
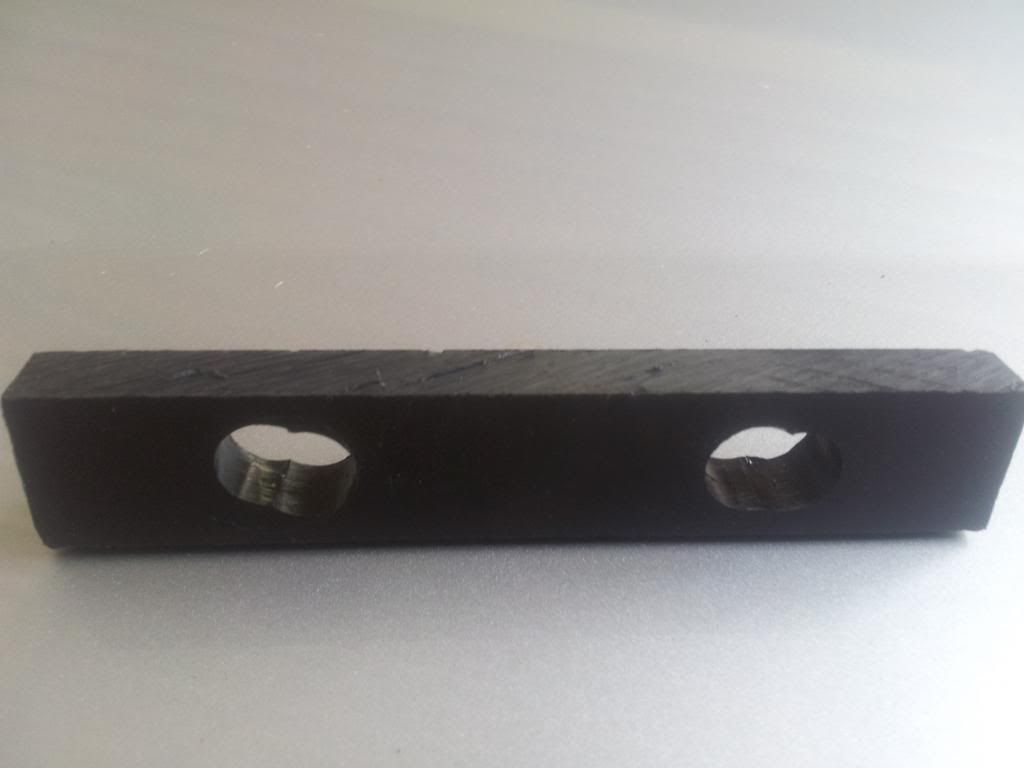
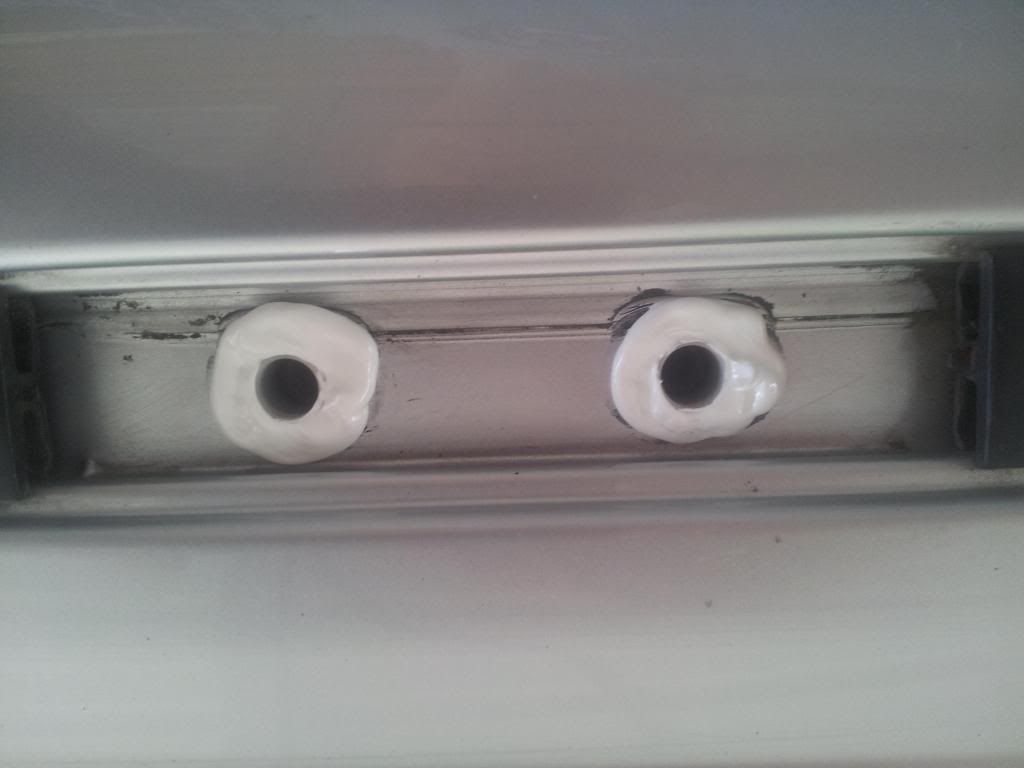
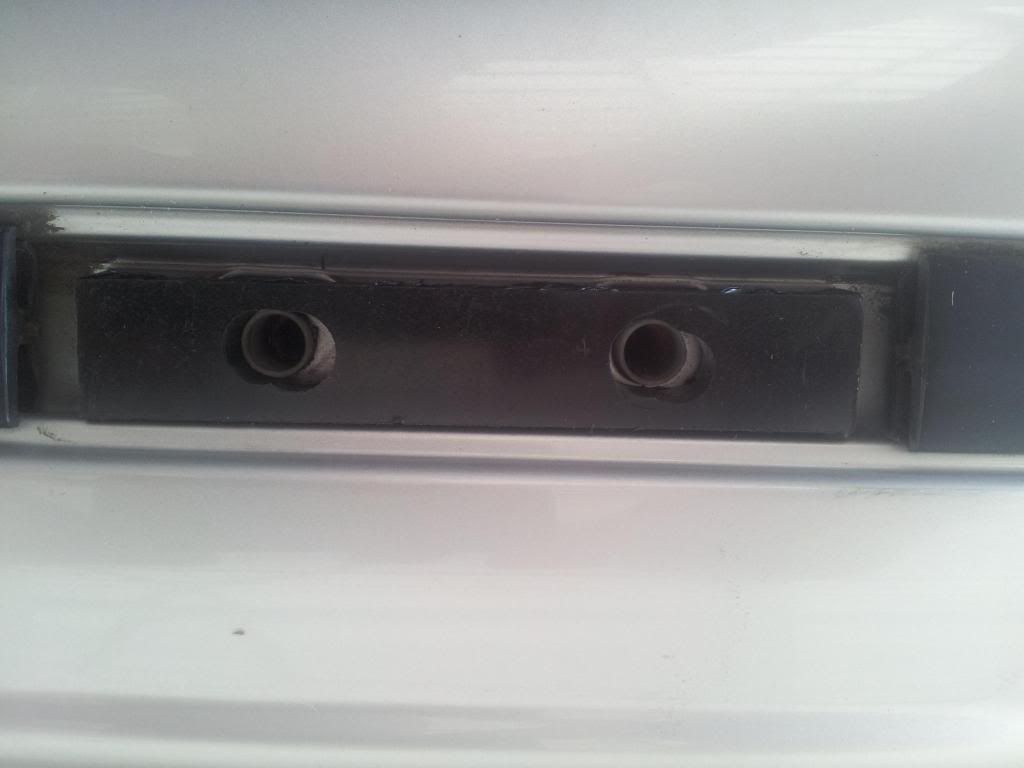
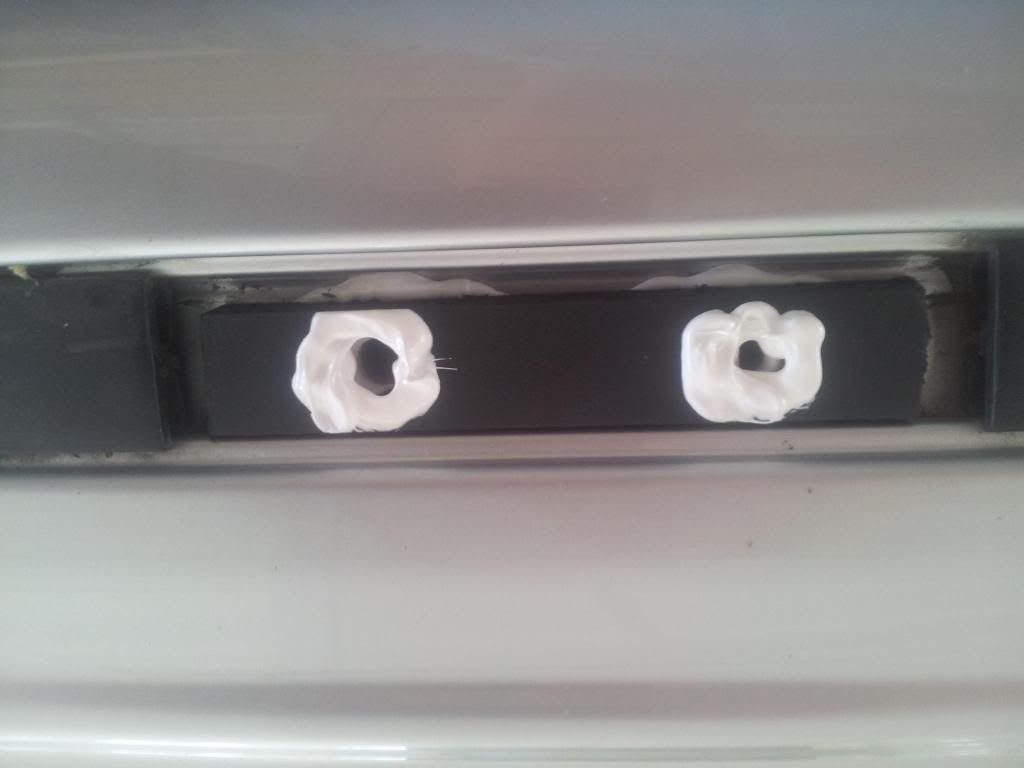
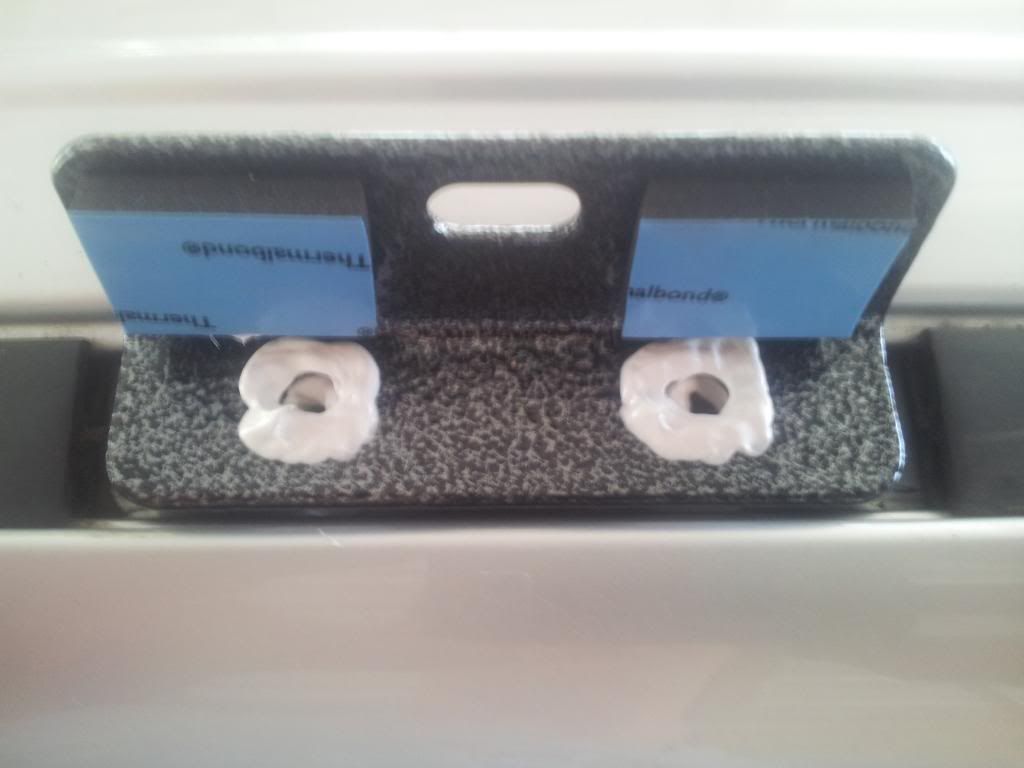
    I didn't get to see the car until a couple of days later and i was not too impressed. The paint job seemed pretty decent. That's about the only positive thing i've got to say. My attention was immediately drawn to the right infill panel which had a gap next to the headlight washer which was sitting proud of the infill panel.


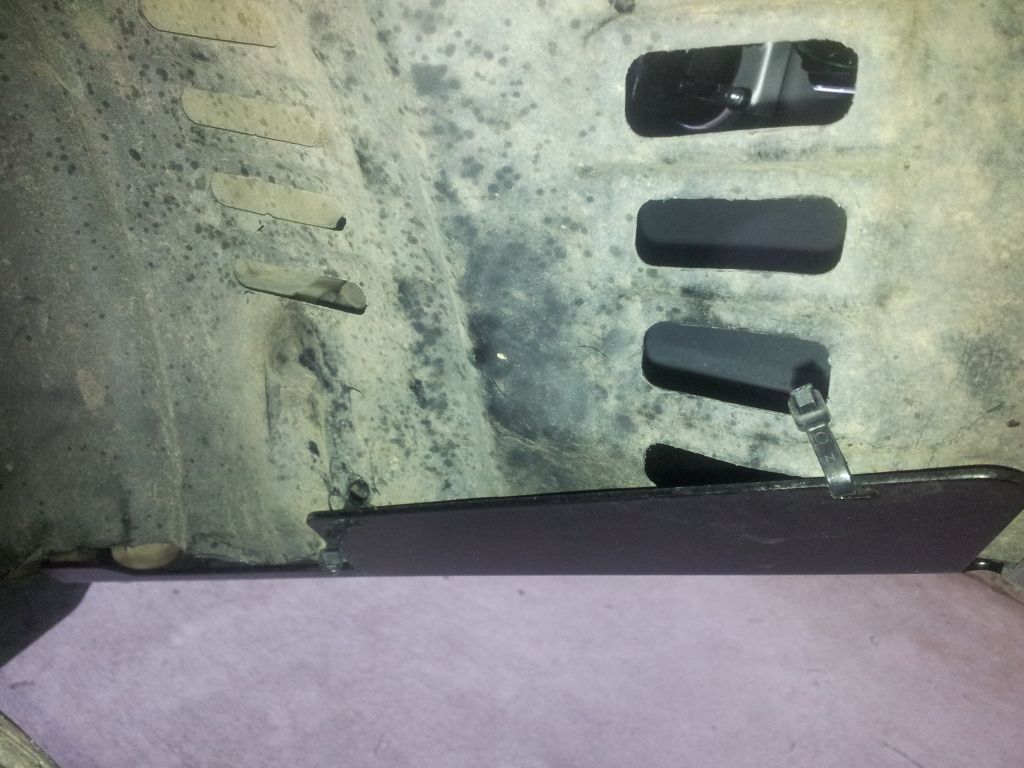
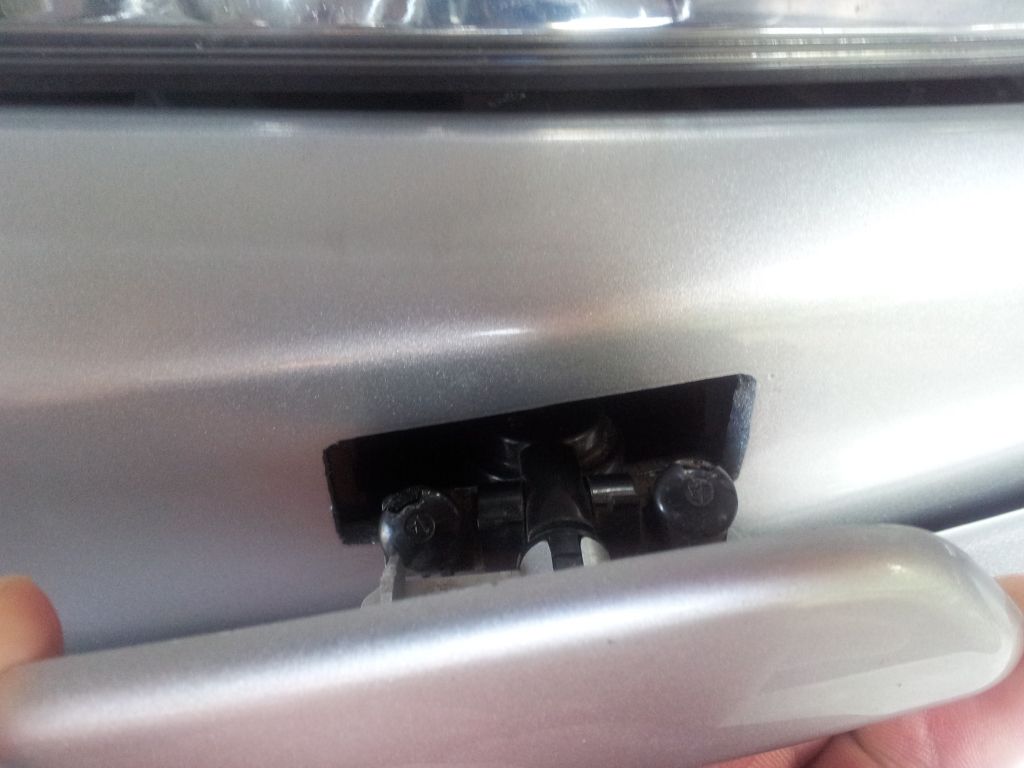
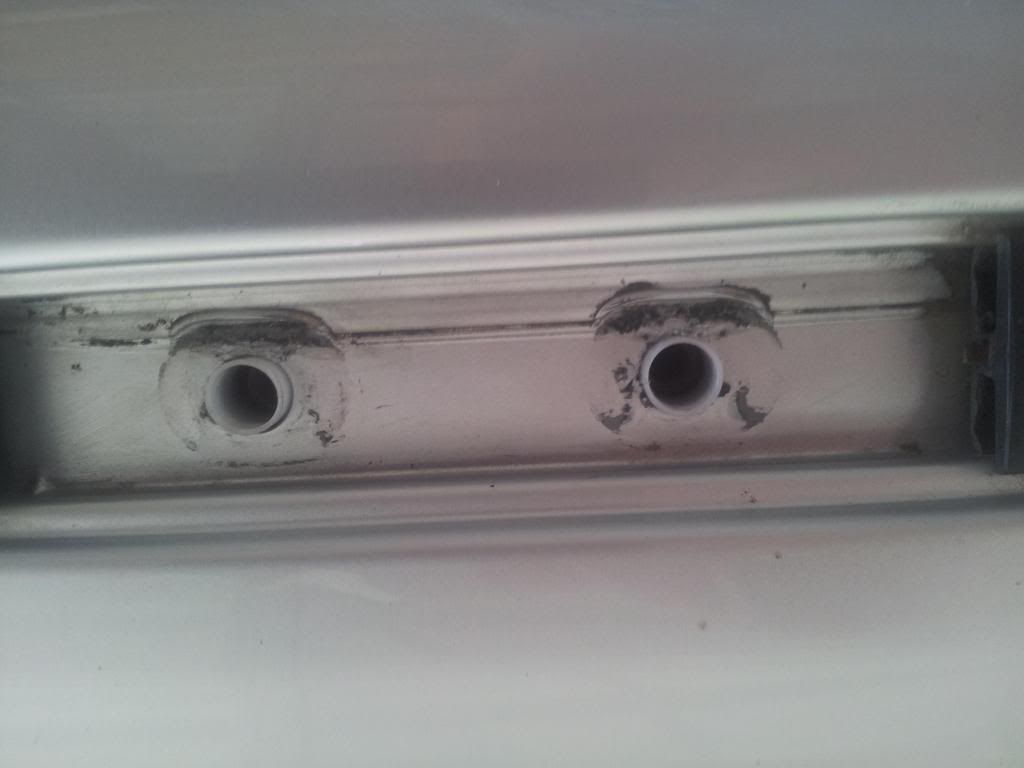
    I pulled the washer away from the panel and saw a cutting job that would have been better done by a cross eyed chimpanzee having a seizure.


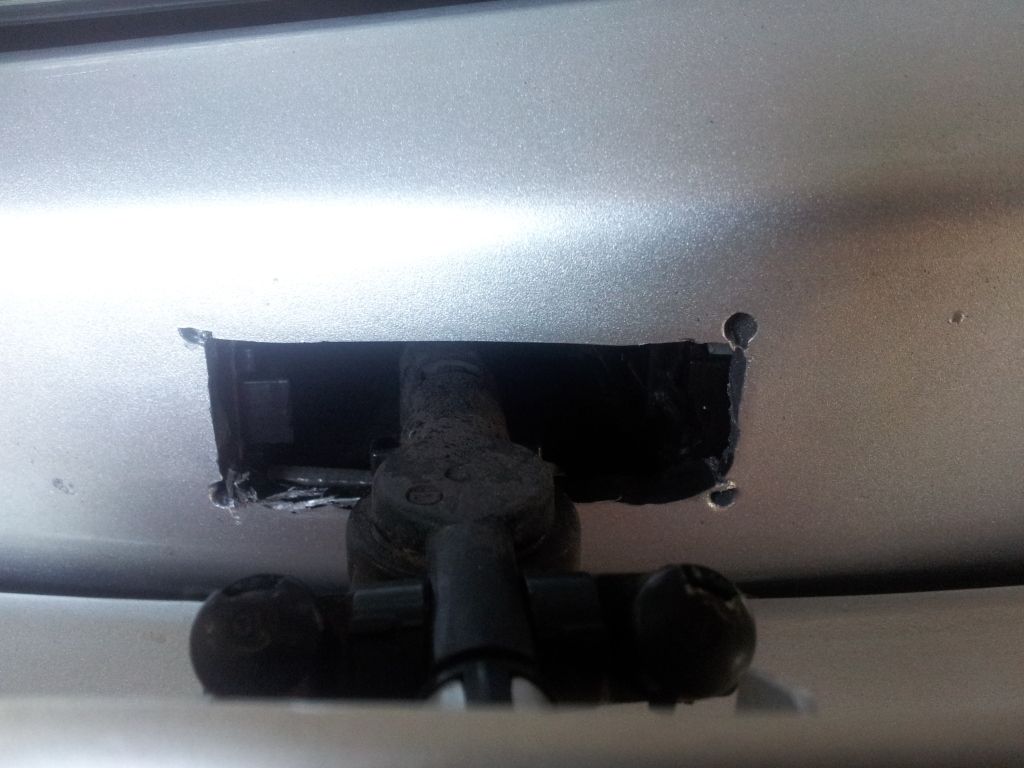
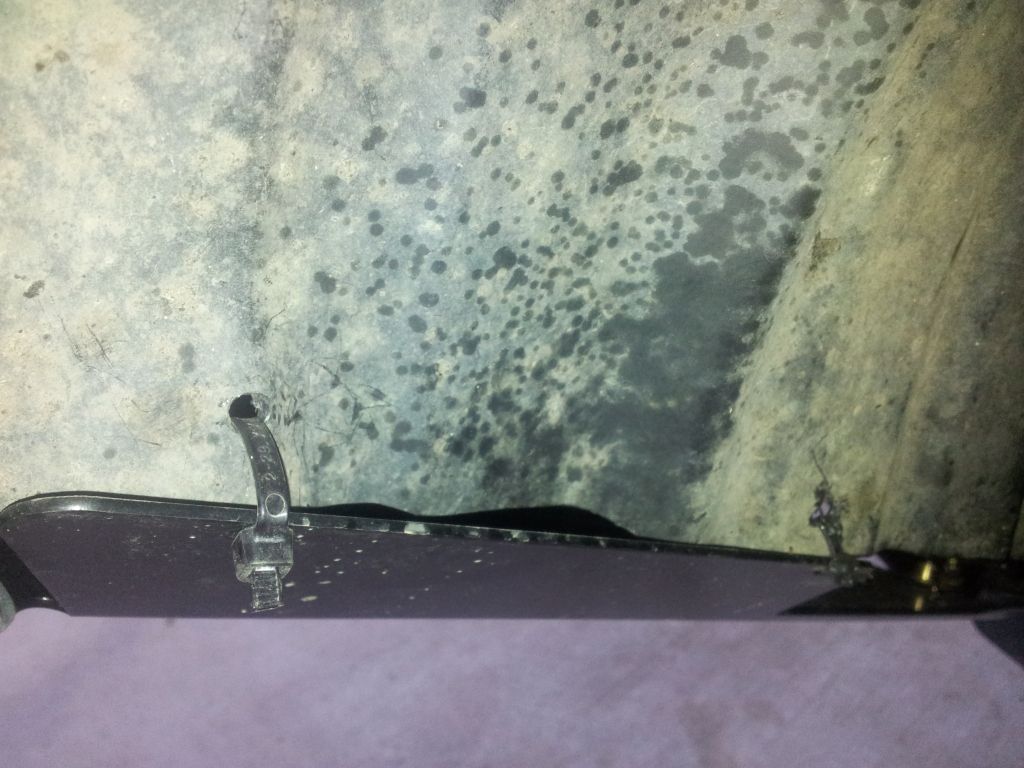
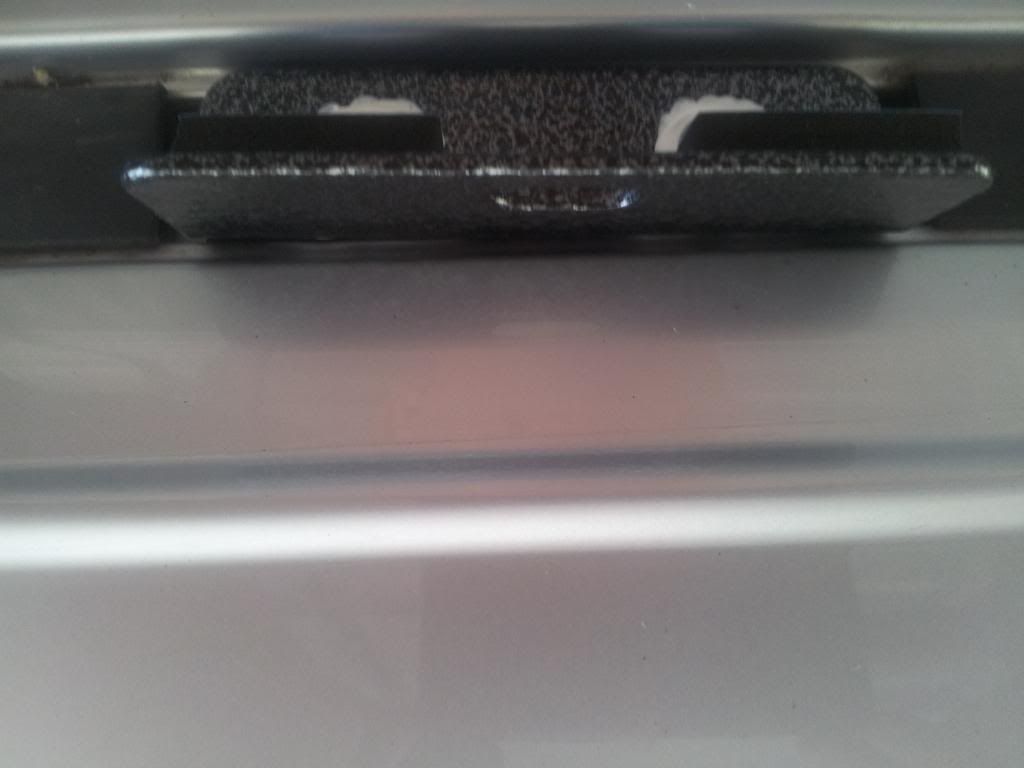
    I had a look at the passenger side washer and it wasn't much better.

    My build [url]http://www.pradopoint.com/showthread.php?25816-Mikes-150VX-Yes-it-s-another-silver-Prado[/url]

  • #2
    I had a look over the rest of the bar and found that the plastic wheel arch guards had been cut too short, possibly by the same chimpanzee and they'd been cable tied to the plates


    I also found some of the screws were loose and part of the bar had been gouged.


    My first call was to TJM Brendale to get some background information and to see what could be done about fixing the problem. I spoke with Darren and he told me that the infill panels have a "cut here" template on the back for the headlight washers but that they could be difficult to cut. He kindly offered to supply the infill panels with the holes cut correctly, all free of charge. He also said that the pack should have come with screws to attach the plastic guards to the plates. He offered to supple these too.

    I called up Steve to discuss the options with him. I'd gotten no further than saying that i was disappointed with the quality of work and he starts up on me, telling me that he had 2 guys work 6 hours fitting the bar, that he's lost money on this job and that he'll never fit another TJM bar again... ever. I ignored his whining and told him that i still wanted it fixed, then told him the solution i'd come up with. All he had to do was paint the panels and fit them and when can i bring it in. His response was, "you just do what you've gotta do." With that attitude i decided i don't want anyone from his business touching my car again.

    I called up Darren again and he said "No worries, $60 for the paint and we'll fit them for you." He also offered to fix up my guards. I couldn't believe it. These guys owed me nothing. They gave me a good price on the equipment, i went with someone else to get it fitted and they had no obligation to do anything.

    I took the car in today and boy i'm glad i did. They found a couple of screws and bolts hadn't been tightened properly and the "pinning bolts" hadn't been fitted at all. They also fabricated a bracket to overcome the problem with the shortened guards, realigned the bar so that it sat a little better, and fitted the new infill panel.
    My build [url]http://www.pradopoint.com/showthread.php?25816-Mikes-150VX-Yes-it-s-another-silver-Prado[/url]

    Comment


    • #3
      This is what it's supposed to look like when done by professionals. Note the flush fit and smooth edges.


      I waited in the shop for just under 3 hours while they did their work. They only charged me for an hour of labour.

      I cannot offer enough praise for the service provided by both Justin and Darren. It's a long drive from Tamborine, but TJM Brendale will get my business from now on.

      Mike
      My build [url]http://www.pradopoint.com/showthread.php?25816-Mikes-150VX-Yes-it-s-another-silver-Prado[/url]

      Comment


      • #4
        I've got the roof rack sitting in the shed. I'm just waiting for a free day to get stuck into it.

        I also took a picture of what the CV angle looked like after fitting the bar.


        Next to go on will be tyres (perhaps wheels too) since the original rubber is almost spent, and a 2" lift to address the exacerbated nose dive since the bar got fitted. I've also got my eye on a winch and an airtec snorkel, but that'll take some skillful negotiating with the minister.

        Mike
        My build [url]http://www.pradopoint.com/showthread.php?25816-Mikes-150VX-Yes-it-s-another-silver-Prado[/url]

        Comment


        • #5
          nice stuff mate, wish i got to keep my headlight washers when mine was done. i went looking for the hose and found it cut at the pump and cable tied on itself after my bar was installed.
          150 VX diesel. Awesome bonnet protector! Monster Rides 3" Susp Lift, 265/70/17 MT MTZ's on Dick Cepek Torques, TJM T13 bar,TG150 Guard, Airtec Snorkel, Lightforce HID's, GME TX3540, CKMTA12 compressor, redarc dual bats, Drawers, fridgy drop slide, Maxtrax, More to come... one day!
          [URL="http://www.pradopoint.com/showthread.php?18807-ages-150-VX-D4D-black"]My Rig Buildup[/URL]

          Comment


          • #6
            Mike now u know why I bang on about these guys, they go over and above!!!
            [b]Rob[/b]

            [b]2016 Toyota Hilux SR5 D4D Auto Company Cruiser... [/b].
            [url=http://www.pradopoint.com/showthread.php?23866-Hutch-s-2012-150-GXL-V6-petrol-Auto]Hutch's 2012 Build up[/url]
            [SIGPIC][/SIGPIC]

            Comment


            • #7
              I've had my Tracklander 2.1m aluminium roofrack sitting on the verandah for the past 3 months and have made a number of false starts in attempting to get it fitted. The first attempt was foiled when i found the leg mount kit was missing an entire set of nuts, bolts, washers, and the channel nuts. A quick call to Darren and Justin at TJM Brendale and he sorted it out through the rep. A package arrived in the mail within a week. Unfortunately i didn't see them sitting on the kitchen bench until a fortnight later (after emailing Justin and asking when i could expect them.) The second false start came just after this when i opened the packet of missing bits and pieces, and found that Jarram had sent nylock nuts instead of channel nuts. Another call to Darren and within the week i had everything i needed. Just didn't have any spare time.

              I had planned to be camping at Neurum Creek this weekend, and in preparation for this i fitted the roofrack. Unfortunately that plan fell through, so here i am posting this.

              This is how it came in the box. I was surprised how light this thing is. The construction and hammertone application seemed solid (and it would want to be for the price they ask!)


              The kit came with an A4 6 page instruction book for fitting. It was pretty helpful. Unfortunately they specifically state that it's not to be reproduced in any way, shape or form, so i won't be including the instructions here.

              First job was removing the roof rails. I followed the very helpful information posted by Garry here http://www.pradopoint.com/showthread...ght=roof+rails
              I've taken a number of my own photo's. The quality is nowhere near as good as Garry's but hopefully it helps.

              I pushed down hard on the top of the cover and used blunt dinner knife to push the rubber seal in under the cover. This allows better access to the retaining clips and helps keep the cover from popping back into place when retaining clips are released. I found the key to success was a lot of downwards pressure. The clips should then easily pop out by rotating the knife under the cover to pop the clips free.
              mickmac_42
              Senior Member
              Last edited by mickmac_42; 08-12-2012, 04:38 PM.
              My build [url]http://www.pradopoint.com/showthread.php?25816-Mikes-150VX-Yes-it-s-another-silver-Prado[/url]

              Comment


              • #8
                I only needed to pop out the two outer clips. The inside clips will pop off when by gently rotating the cover and pulling away from the rail. This is what it looks like when the cover is removed. You can see the clips inside the cover and where they line up with the frame.


                And a top-down view of the frame.

                It took me about ten minutes to get the first clip. Once i'd done that, i had the rest off within ten minutes.
                mickmac_42
                Senior Member
                Last edited by mickmac_42; 08-12-2012, 04:13 PM.
                My build [url]http://www.pradopoint.com/showthread.php?25816-Mikes-150VX-Yes-it-s-another-silver-Prado[/url]

                Comment


                • #9
                  The middle cover took me a while to work out what was going on. I ended up inserting the knife into the gap at the back/inside of the rail leg mount, then gently rotating the knife around the leg. This quickly popped the cover off.

                  This is what the cover and frame look like.
                  My build [url]http://www.pradopoint.com/showthread.php?25816-Mikes-150VX-Yes-it-s-another-silver-Prado[/url]

                  Comment


                  • #10
                    I removed all the silver bolts (12mm socket i think) and roof rails came free. This left the middle anchor point. I think i used a 10mm socket to remove these black bolts.


                    Once all the bolts were removed i cleaned the channel using some metho and a rag. Here's the bolt holes once i've cleaned them up.

                    The channel was filthy. I didn't realise that water is able to get underneath that black plastic strip.
                    My build [url]http://www.pradopoint.com/showthread.php?25816-Mikes-150VX-Yes-it-s-another-silver-Prado[/url]

                    Comment


                    • #11
                      Jaram supply these plastic spacers for the leg mount anchors to sit on. They came pretty rough, so i used a lighter to melt it smooth. I doubt it makes any difference but it would have annoyed me if i hadn't done it.

                      mickmac_42
                      Senior Member
                      Last edited by mickmac_42; 23-12-2012, 11:44 AM.
                      My build [url]http://www.pradopoint.com/showthread.php?25816-Mikes-150VX-Yes-it-s-another-silver-Prado[/url]

                      Comment


                      • #12
                        I applied a bead of automotive sealant/adhesive around the bolt holes. I meant to get black sealant, but some clown had placed this white sealant in with the black sealant.


                        Plastic spacer goes on top.


                        Another bead of sealant around the top. I also put it just inside the hole so that the bolt threads got a coating as they went in.
                        My build [url]http://www.pradopoint.com/showthread.php?25816-Mikes-150VX-Yes-it-s-another-silver-Prado[/url]

                        Comment


                        • #13
                          The leg mount anchor then sits on top of the plastic spacer and another bead of sealant around those holes. The foam pads face toward the side of the car.


                          Finally, it's all secure in place with two bolts and allowed to dry.


                          You can see from this top-down view that there is a gap between the leg mount and the edge of the channel/roof. There is sufficient tolerance in the setup to allow the leg mount to be moved around a little for variation in placement. I thought it best that it not contact any metal on the car.
                          My build [url]http://www.pradopoint.com/showthread.php?25816-Mikes-150VX-Yes-it-s-another-silver-Prado[/url]

                          Comment


                          • #14
                            I attached the legs to the base of the rack while i was waiting for the sealant to dry. Jarram mark each leg with grease pencil so it's obvious where they're meant to go (FR, MR, RR, FL, ML, RL). They made this interesting for me by incorrectly labeling the legs. A little trial and error and i soon worked out the correct location. The separation between the bolt holes only allows the legs to mount to one group of rails.

                            There is a bolt hole in the leg for fixing to the anchor point. The manual (correctly) states how far from the rear of the rack this bolt hole should be. Further, the manual states how far apart each set of legs should be placed laterally. This allowed me to place each of the legs pretty much where they needed to be before lowering the rack onto the car. Jaram recommend doing it this way, as opposed to fixing the legs to the anchor, then fixing the rack to the legs. Not sure about this, but i'm not going to pull it all apart now and find out.

                            This is the only picture i took showing the attachment between anchor, leg, and rack.

                            You can see that the leg completely conceals the anchor.
                            mickmac_42
                            Senior Member
                            Last edited by mickmac_42; 23-12-2012, 11:45 AM.
                            My build [url]http://www.pradopoint.com/showthread.php?25816-Mikes-150VX-Yes-it-s-another-silver-Prado[/url]

                            Comment


                            • #15
                              I fashioned a sling and suspended the rack under the carport, then backed in underneath. I lowered the rack into position and attached the rear legs to the anchor points with the supplied hexhead thumbscrew, two washers and a nylock nut.


                              I would recommend putting a cloth down over the part of the roof where you're working. I didn't and i ended up with a couple of scratches and a dint. The dint happened because i couldn't find the correct sized socket and ended up using the shifter. When i tightened it up using the allen key, the shifter pushed down into the roof leaving a nice little dint.


                              I then did it again on the next leg.
                              My build [url]http://www.pradopoint.com/showthread.php?25816-Mikes-150VX-Yes-it-s-another-silver-Prado[/url]

                              Comment

                              canli bahis siteleri bahis siteleri ecebet.net
                              mencisport.com
                              antalya escort
                              tsyd.org deneme bonusu veren siteler
                              deneme bonusu veren siteler
                              gaziantep escort
                              gaziantep escort
                              asyabahis maltcasino olabahis olabahis
                              erotik film izle Rus escort gaziantep rus escort
                              atasehir escort tuzla escort
                              sikis sex hatti
                              en iyi casino siteleri
                              deneme bonusu veren siteler
                              casibom
                              deneme bonusu veren siteler
                              deneme bonusu veren siteler
                              betticket istanbulbahis
                              Working...
                              X