 Tweet
Tweet
Hi Guys,
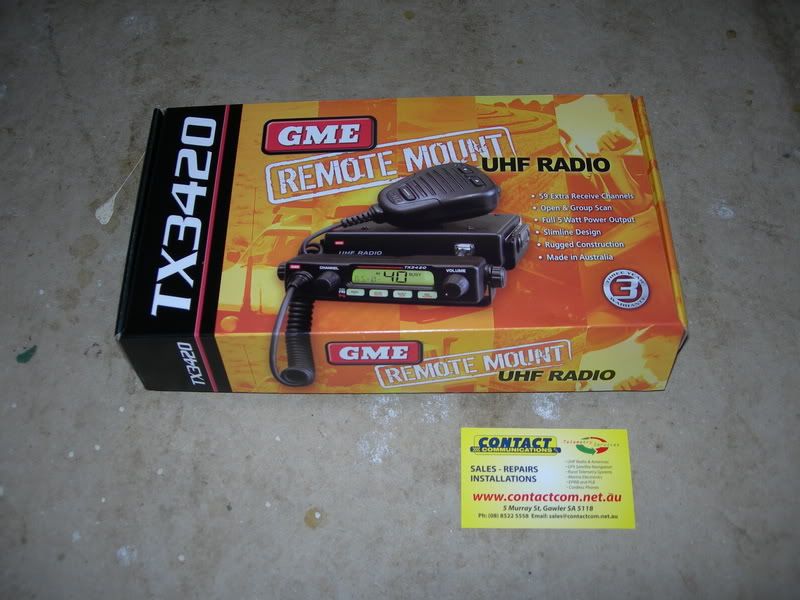
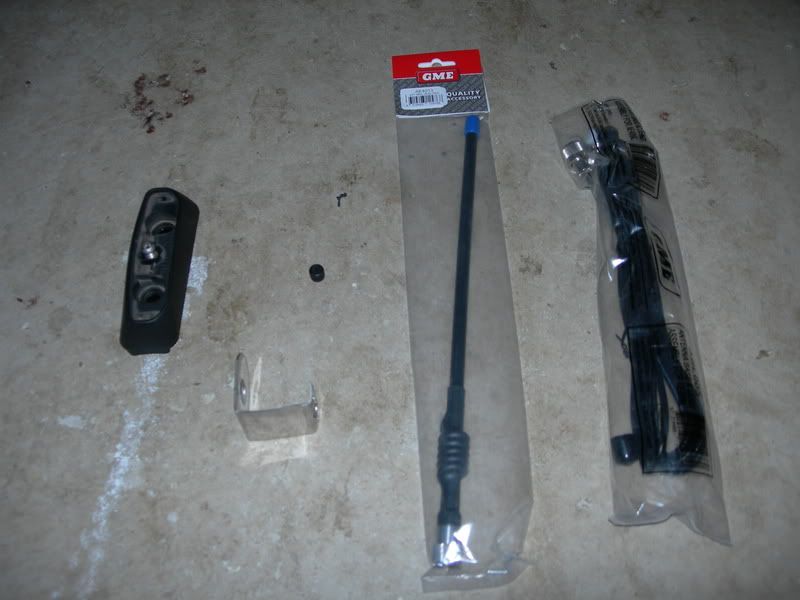
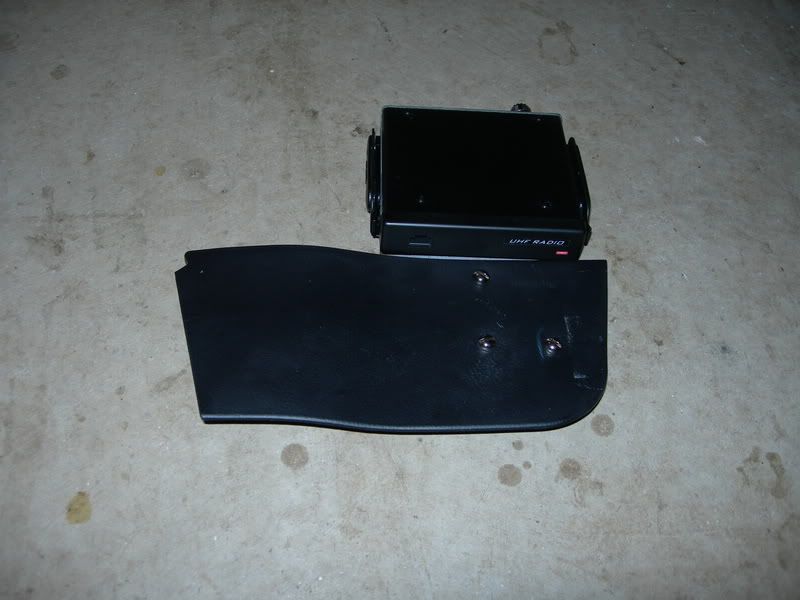
Recently bought a GME TX3420 along with a stubby AE4005 from Contact Communications in Gawler, Adelaide. I thought this was pretty good value for $349 for the radio and $29 for the antenna along with $22 for the antenna base and $11.00 for a bracket (which I then went ahead and bastarised).
I was very happy with using Contact Communications and would do it again if I where buying a new radio.
So here is my install
Grab a few idiot guides/cheat sheets for reference
I don't have a bullbar at this point in time. Might look at something later so for now I considered a roof mount or bonnet but settled on the roof. I have two Rhino Sportz bars and thought I would use the base of one of these as the basic mount point and then locate the antenna bracket on this. I was using a crap MB404ss bracket which I used a precision knockometer to encourageit to do my bidding. I then mounted this ontop of the roofrack base to give me this
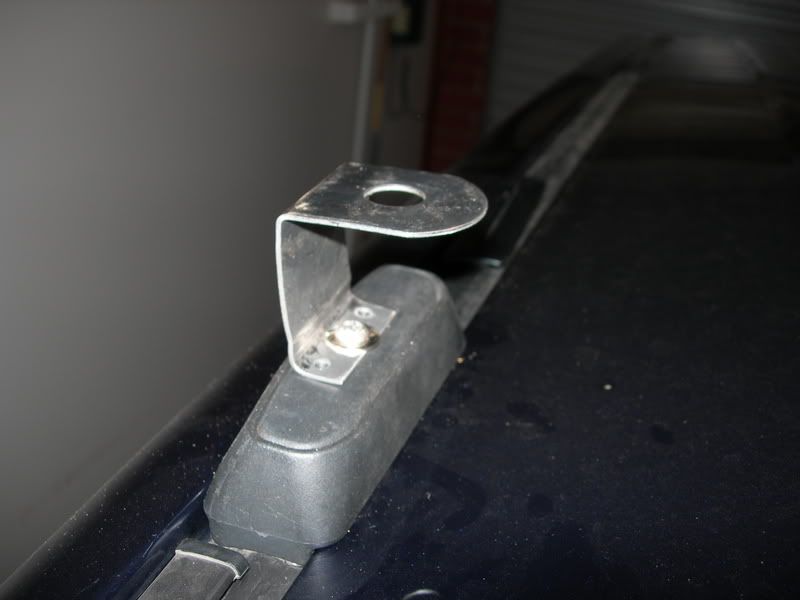
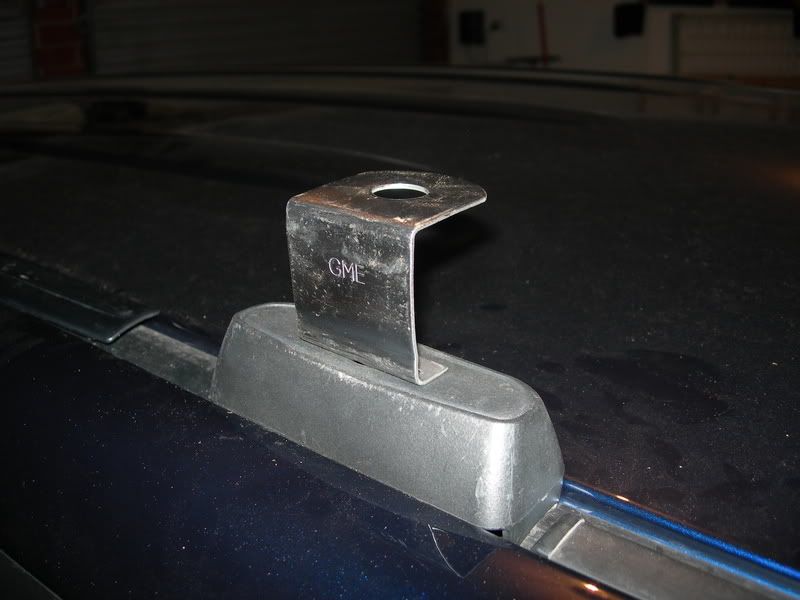
Kind of ugly looking but this had to do since I was heading away for a weekend on the Border Track (South Australian/Victorian Border) for the weekend so had to get this done.
I had read how Drew ran the Coax through the firewall, past the windscreen wiper box and along the edge of the windscreen.
Icom IC-7000 Installation
I think I ended up doing something simillar, but you never can tell. From where the roof rack mount is located, the coax runs through the small channel across the roof until it curves down at the top of the windscreen.
Sorry but I didn't get any picyures of this after I installed
Actually I did get a few after shots but only a few
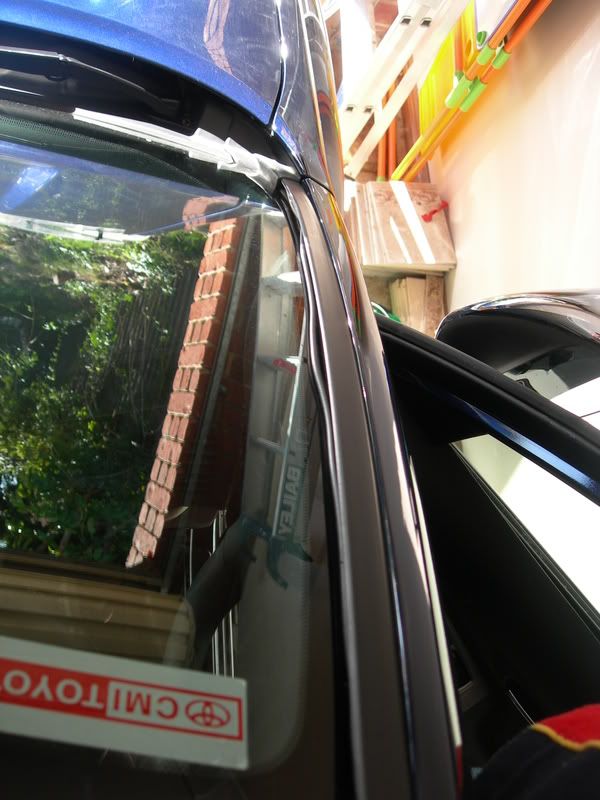
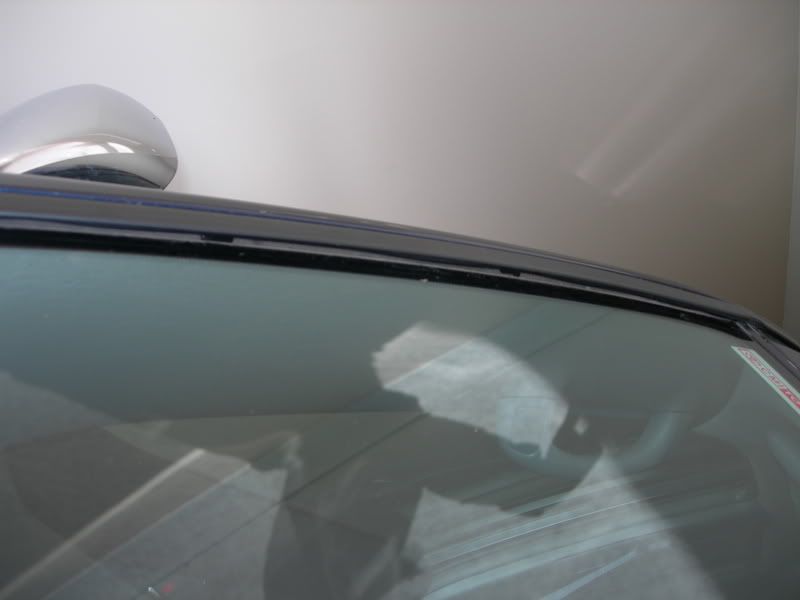
This was how it looked down the side of the windscreen after the initally fitting. Wasn't real happy as it looked ordinary but time was limited.
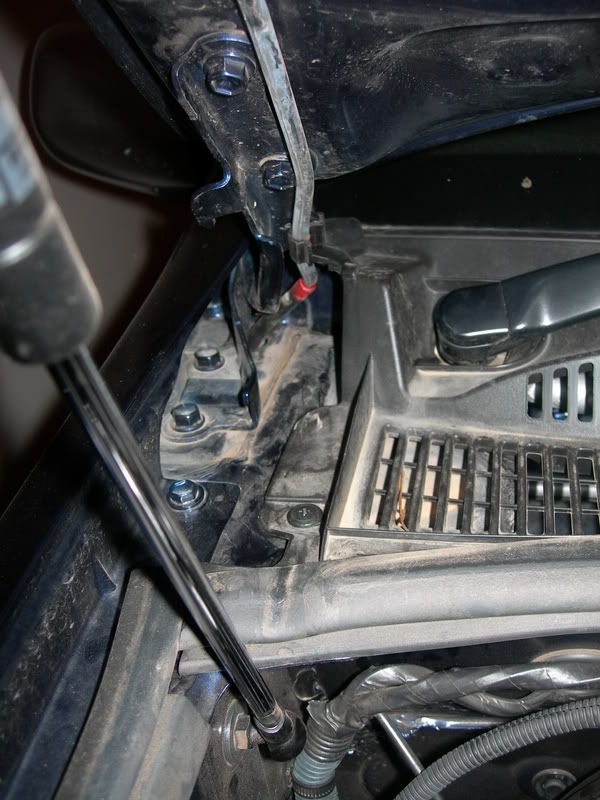
Through this area I run the coax in some split tube to provide a bit of mechanical protection from the bonnet. I then drilled two very small holes, up high, in the side of the water drain in front of the wipers so I could then cable tie the split tube to ensure that the coax was kept out of the way of the arm of the bonnet.
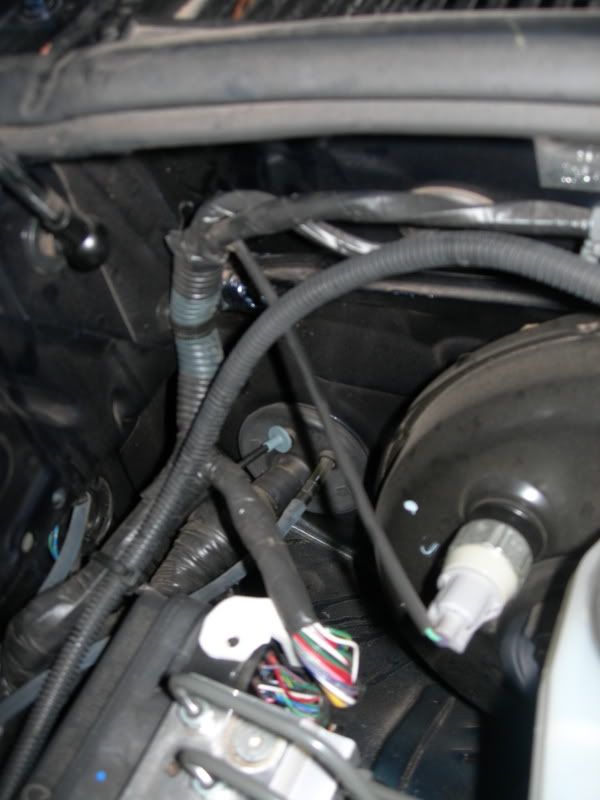
I then put a small small hole through the driver side firewall and pushed through with a piece of fencing wire with the coax firmly connected. I also put in a small grommet to ensure I had a reasonable seal around the coax and firewall. Pulled the cable through and everything was cool cool.
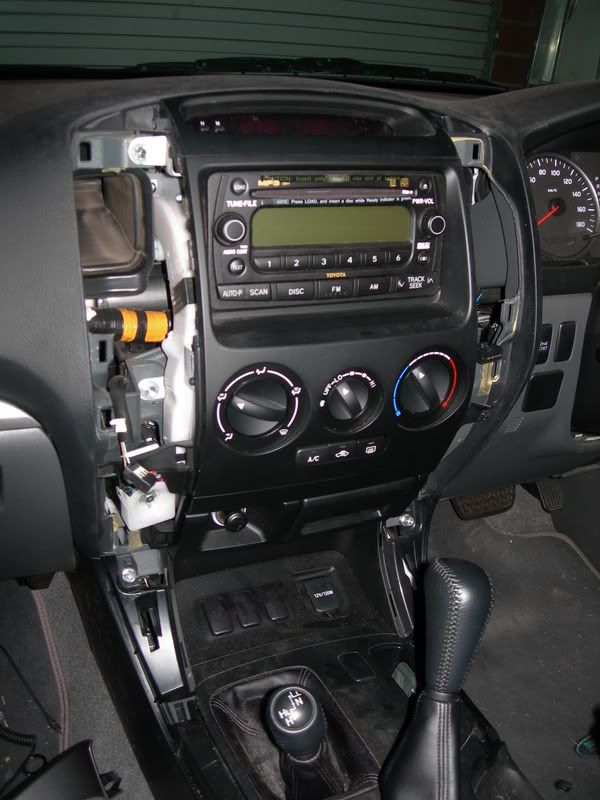
Since this is the family car I was concerned with hacking the plastic with the usual screwdriver/chisel so I pinched some crappy plastic spoons from work used for stiring coffee. I also read as many articles about pulling the dash apart but I founf the following quite useful:
LCOOL - Rear Video Camera (is appicable)
UHF Install in Prado (page 2 with Chippy's fiddly bits)
This resulted in:
The car sat like this for a few days before I installed as we had a long weekend in which the car wasn't used and the radio wasn't to arrive until the Tuesday.
I was happy with no damage to the dash
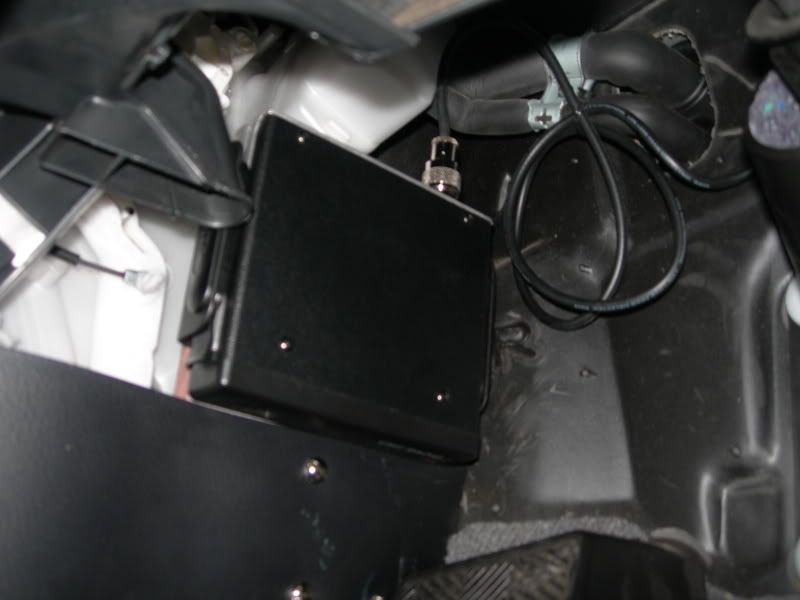
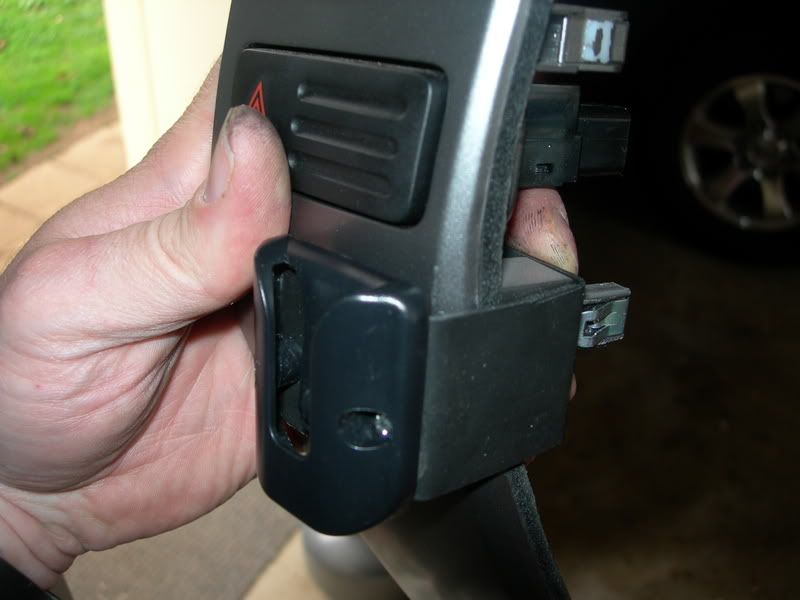
I was inspired by Mike's neat install using a bracket, apparently suggested by Chippy, mounted to the left hand drivers kick panel.
So I started with this
And quickly ended up with

I might take this out at some stage and give it a lick of black paint. I might :roll:
When mounted this then looked like
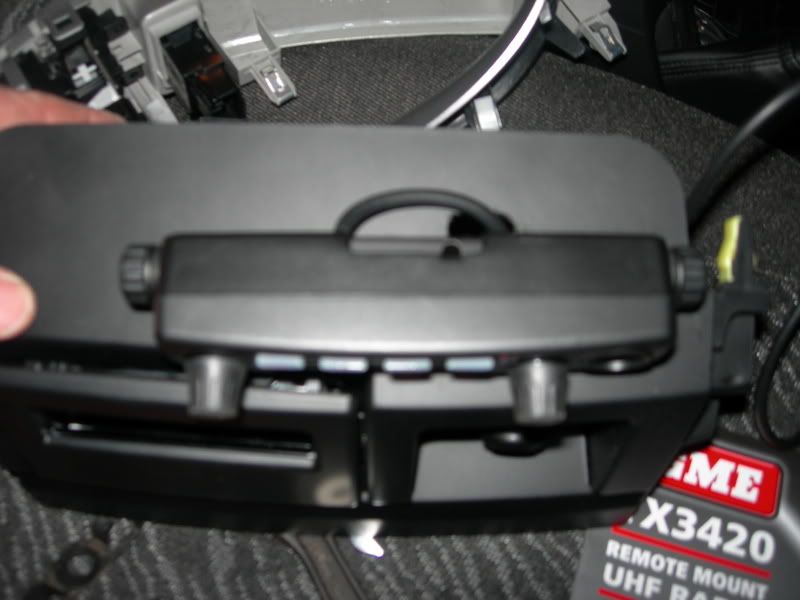
With the dash in pieces I started by locating the remote head under the coin tray and the lighter side. Seems to be a common place.
Required a few small holes to be drilled and if I sell the car, without the radio and I may (probably not) consider buying a new peice of plastic to replace the one with holes.
With the remote head mounted I then worked on the power. I descided to take the option of connecting the power to the ciggy lighter. So I worked on this and soldered up the power. Turned on the ignition, without the power connected to the unit, and tested the power with a multimeter a number of times. Just being a little precautous. All was good, so far.
Now connect the remote head to the unit and the power.
Turn on the ignition.
Turn on the unit.
Nothing happened. :cry:
Played around with this for a while. Only two days to go before heading off on the Border Track (Weekend on the Border Track).
Descided to take the car the next day, dodging work for a few hours, to Electric Bug in Adelaide, and not Contact Comminications, as that would take an hour to drive each way. The guys at EB had a look at the install. They where really impressed with the location and mounting of the base unit (thanks Mike and Chippy) and played around with the base unit and remote head. Took it out and plugged into the workshop and it worked a treat. I was happy to hear this since the last thing I wanted was a toasted UHF.
Turned out that the problem was when I tested the power with the multimeter and I pushed the prongs into the power connector I must have spead the connection terminal since this wasn't making contact. $30.00 later all was good. I was very happy now. I also bought a different antenna bracket as the original one I had was rubbish, but it did go on the trip with me to the Border Track.
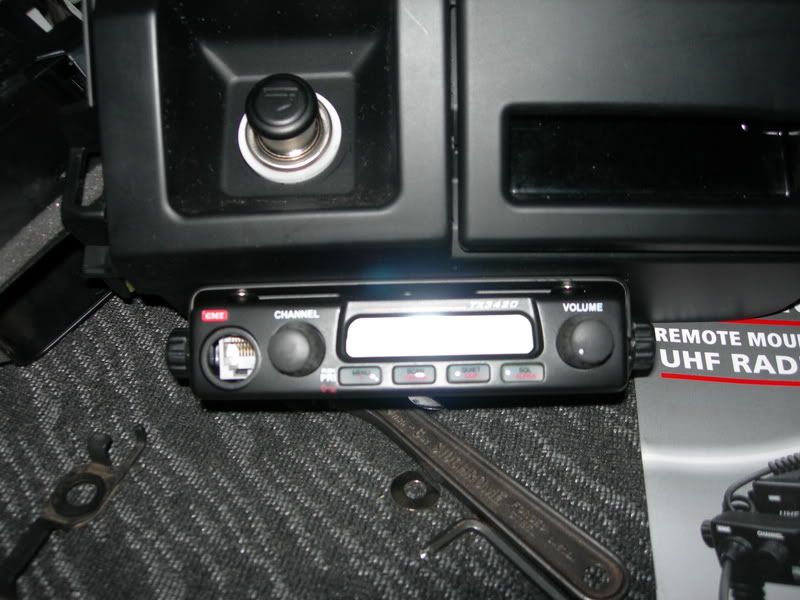
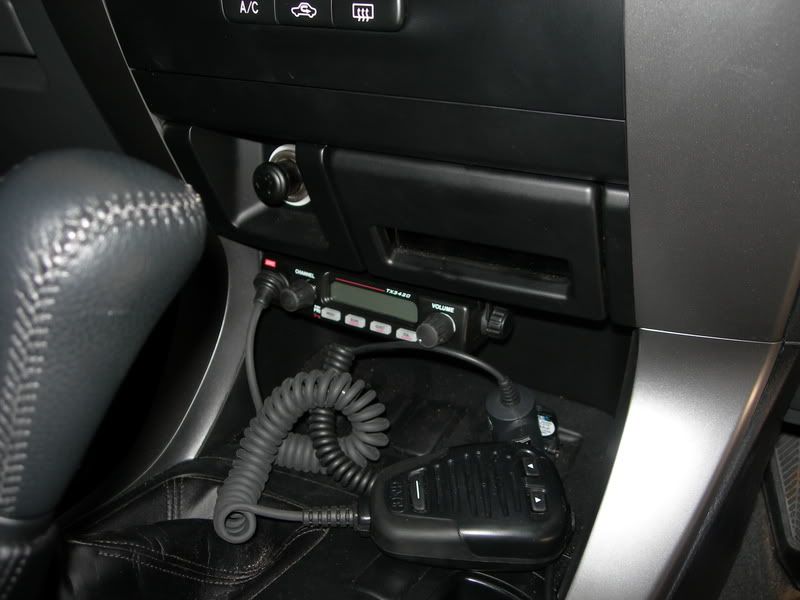
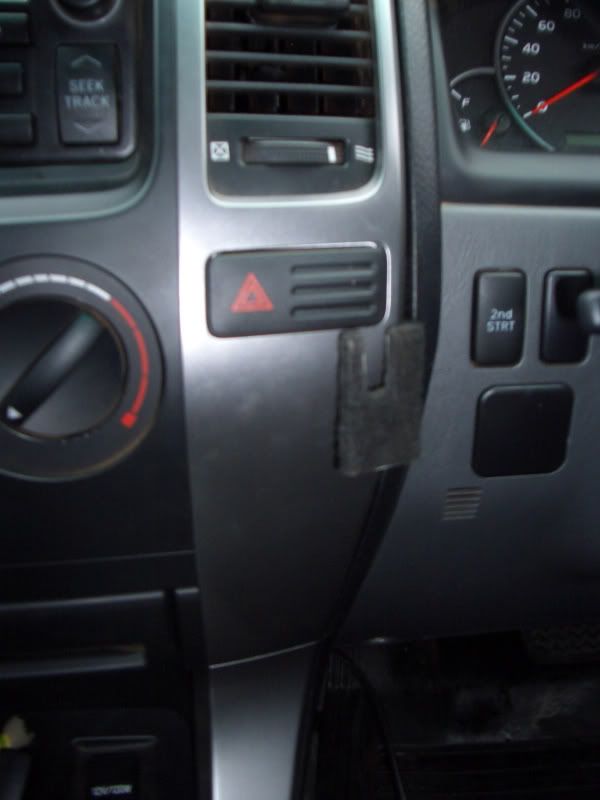
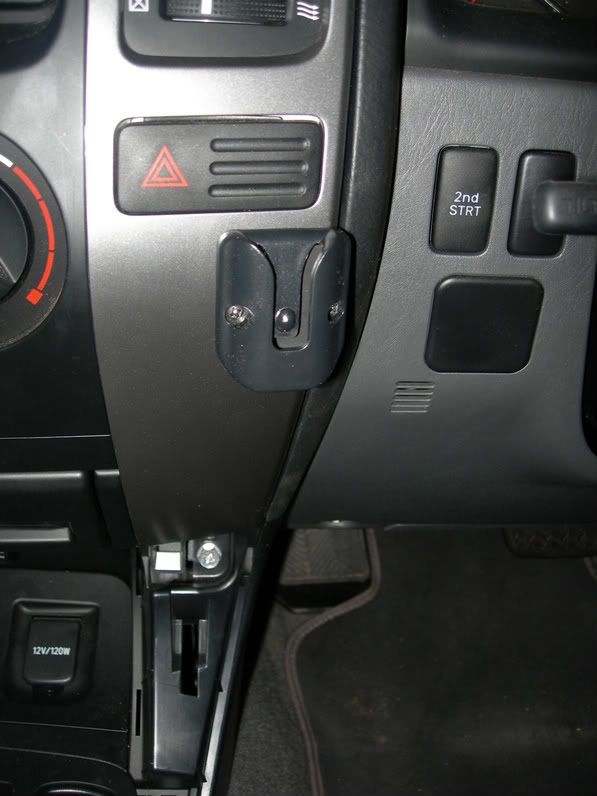
This is how the remote head looked after mounting.
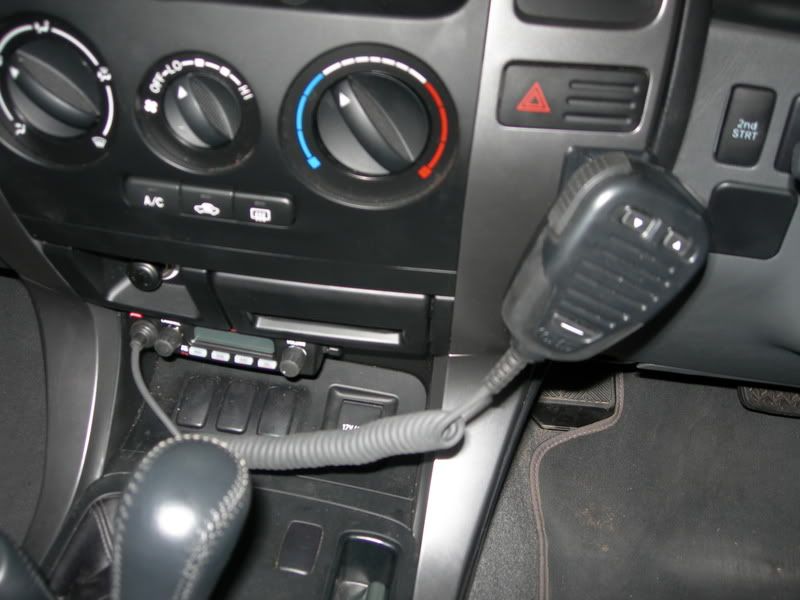
I'm still to fit the base for the mic and might use something like Fishnuts "No Holes" CB Install with the cradle for the mic. This is to be done later.

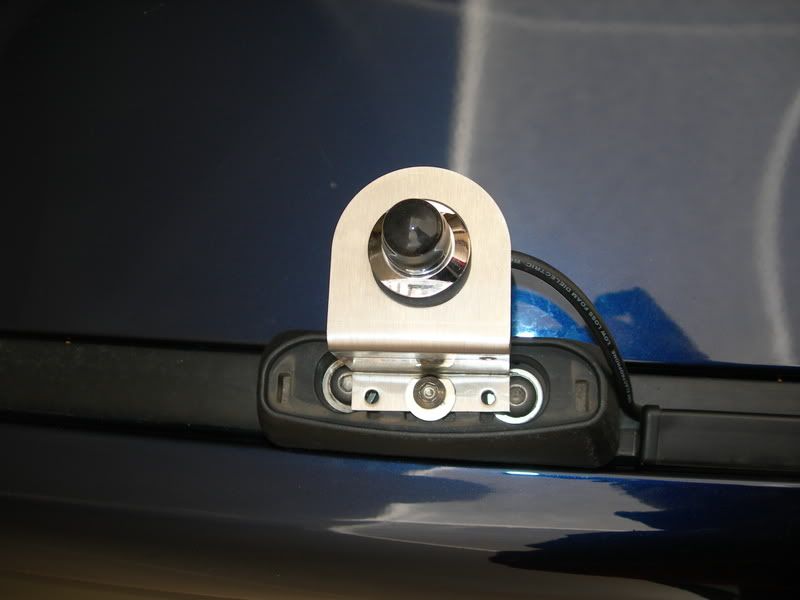
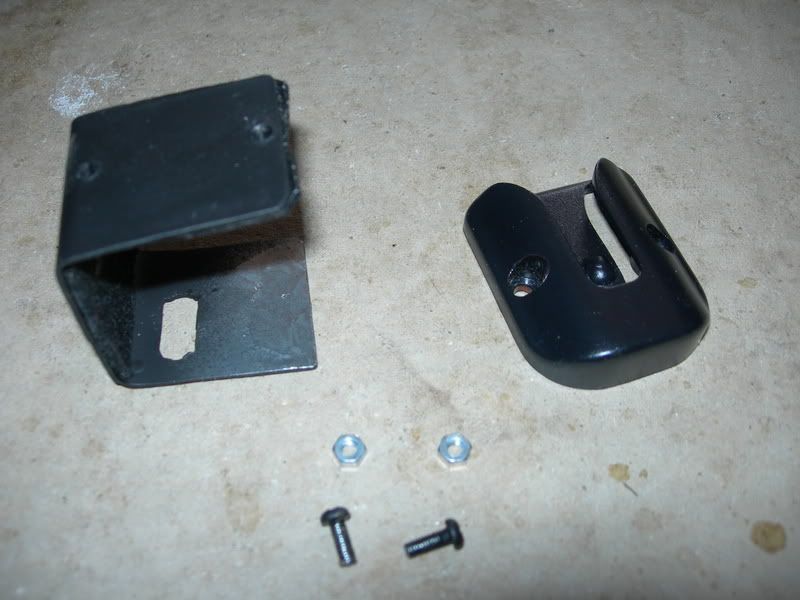
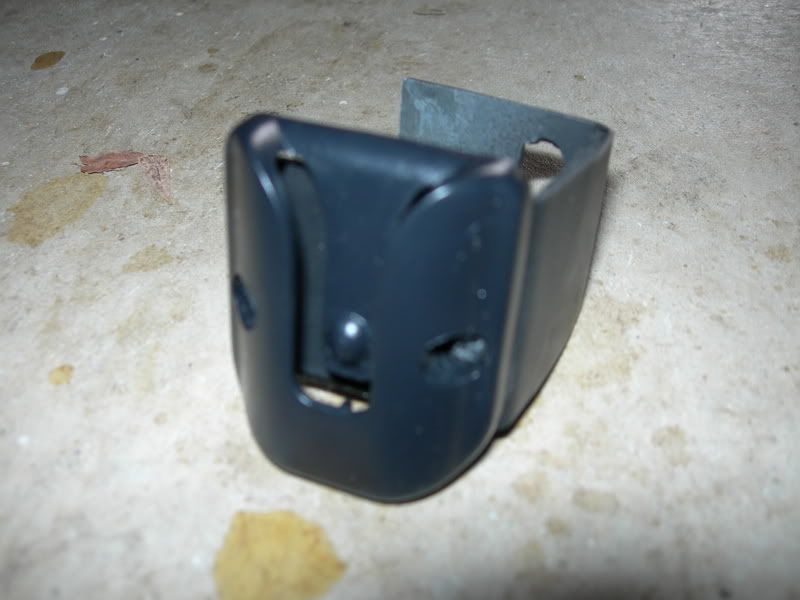
I've since changed the antenna bracket from the rubbish thing to something more solid

I might move this forward to use the main bolts (have brought some 60mm ss bolts) and then I can use a modified cover plate for the roof rack mount to tidy this up a little. Might do this over the weekend. Might!
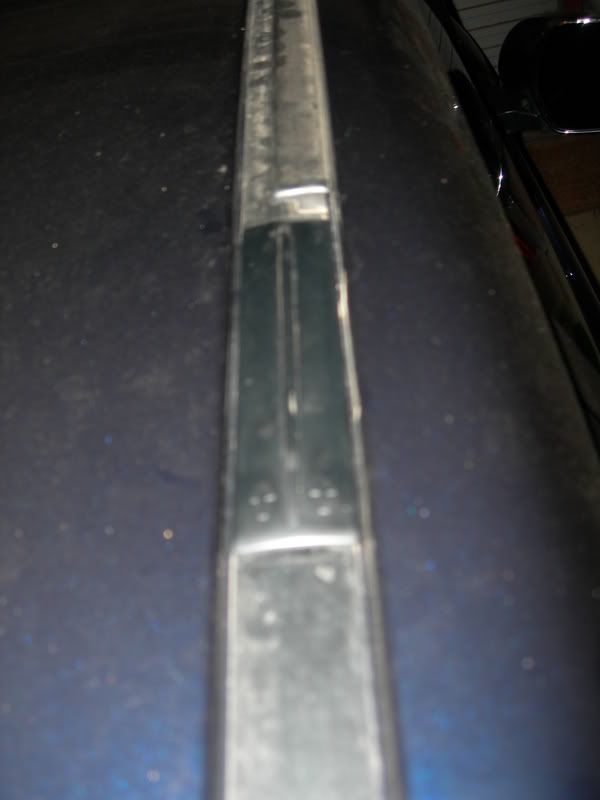
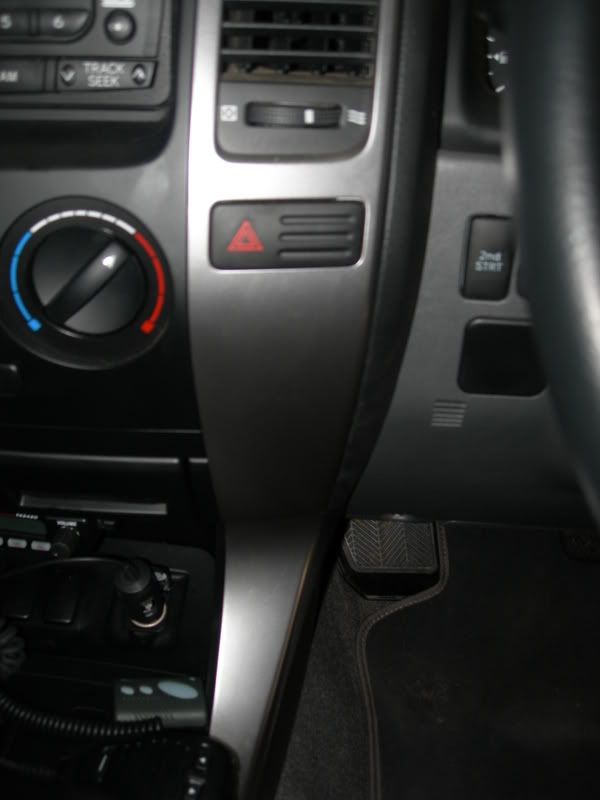
I've also used a a few dobs of silicone in the channel on the windscreen where the coax sits to hold the cable back from view. This is much betterer than what I had before
THe two dark spots is the silicone
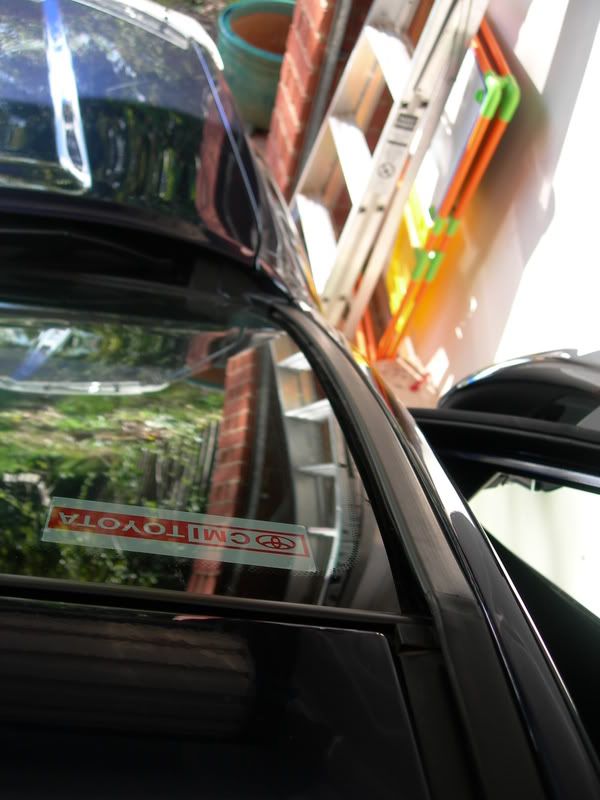
Much neater.
Recently bought a GME TX3420 along with a stubby AE4005 from Contact Communications in Gawler, Adelaide. I thought this was pretty good value for $349 for the radio and $29 for the antenna along with $22 for the antenna base and $11.00 for a bracket (which I then went ahead and bastarised).
I was very happy with using Contact Communications and would do it again if I where buying a new radio.
So here is my install
- :arrow: Get some background material
Grab a few idiot guides/cheat sheets for reference
- :arrow: Antenna Mount
I don't have a bullbar at this point in time. Might look at something later so for now I considered a roof mount or bonnet but settled on the roof. I have two Rhino Sportz bars and thought I would use the base of one of these as the basic mount point and then locate the antenna bracket on this. I was using a crap MB404ss bracket which I used a precision knockometer to encourageit to do my bidding. I then mounted this ontop of the roofrack base to give me this
Kind of ugly looking but this had to do since I was heading away for a weekend on the Border Track (South Australian/Victorian Border) for the weekend so had to get this done.
- :arrow: Run Coaxial
I had read how Drew ran the Coax through the firewall, past the windscreen wiper box and along the edge of the windscreen.
Icom IC-7000 Installation
I think I ended up doing something simillar, but you never can tell. From where the roof rack mount is located, the coax runs through the small channel across the roof until it curves down at the top of the windscreen.
Sorry but I didn't get any picyures of this after I installed
Actually I did get a few after shots but only a few
This was how it looked down the side of the windscreen after the initally fitting. Wasn't real happy as it looked ordinary but time was limited.
Through this area I run the coax in some split tube to provide a bit of mechanical protection from the bonnet. I then drilled two very small holes, up high, in the side of the water drain in front of the wipers so I could then cable tie the split tube to ensure that the coax was kept out of the way of the arm of the bonnet.
I then put a small small hole through the driver side firewall and pushed through with a piece of fencing wire with the coax firmly connected. I also put in a small grommet to ensure I had a reasonable seal around the coax and firewall. Pulled the cable through and everything was cool cool.
- :arrow: Pull the dash apart
Since this is the family car I was concerned with hacking the plastic with the usual screwdriver/chisel so I pinched some crappy plastic spoons from work used for stiring coffee. I also read as many articles about pulling the dash apart but I founf the following quite useful:
LCOOL - Rear Video Camera (is appicable)
UHF Install in Prado (page 2 with Chippy's fiddly bits)
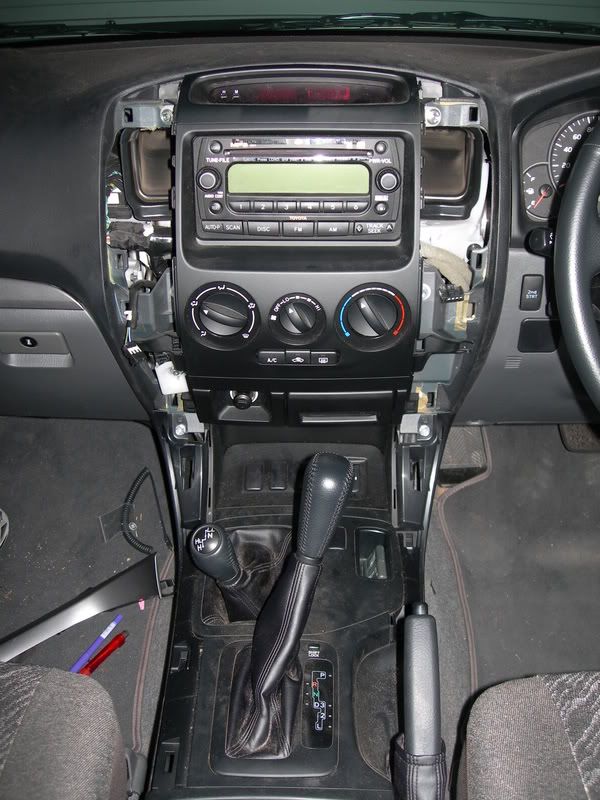
This resulted in:
The car sat like this for a few days before I installed as we had a long weekend in which the car wasn't used and the radio wasn't to arrive until the Tuesday.
I was happy with no damage to the dash
- :arrow: Base Unit Mount
I was inspired by Mike's neat install using a bracket, apparently suggested by Chippy, mounted to the left hand drivers kick panel.
So I started with this
And quickly ended up with
I might take this out at some stage and give it a lick of black paint. I might :roll:
When mounted this then looked like
- :arrow: Remote Head Mount and Power
With the dash in pieces I started by locating the remote head under the coin tray and the lighter side. Seems to be a common place.
Required a few small holes to be drilled and if I sell the car, without the radio and I may (probably not) consider buying a new peice of plastic to replace the one with holes.
With the remote head mounted I then worked on the power. I descided to take the option of connecting the power to the ciggy lighter. So I worked on this and soldered up the power. Turned on the ignition, without the power connected to the unit, and tested the power with a multimeter a number of times. Just being a little precautous. All was good, so far.
Now connect the remote head to the unit and the power.
Turn on the ignition.
Turn on the unit.
Nothing happened. :cry:
Played around with this for a while. Only two days to go before heading off on the Border Track (Weekend on the Border Track).
Descided to take the car the next day, dodging work for a few hours, to Electric Bug in Adelaide, and not Contact Comminications, as that would take an hour to drive each way. The guys at EB had a look at the install. They where really impressed with the location and mounting of the base unit (thanks Mike and Chippy) and played around with the base unit and remote head. Took it out and plugged into the workshop and it worked a treat. I was happy to hear this since the last thing I wanted was a toasted UHF.
Turned out that the problem was when I tested the power with the multimeter and I pushed the prongs into the power connector I must have spead the connection terminal since this wasn't making contact. $30.00 later all was good. I was very happy now. I also bought a different antenna bracket as the original one I had was rubbish, but it did go on the trip with me to the Border Track.
This is how the remote head looked after mounting.
I'm still to fit the base for the mic and might use something like Fishnuts "No Holes" CB Install with the cradle for the mic. This is to be done later.
I've since changed the antenna bracket from the rubbish thing to something more solid
I might move this forward to use the main bolts (have brought some 60mm ss bolts) and then I can use a modified cover plate for the roof rack mount to tidy this up a little. Might do this over the weekend. Might!
I've also used a a few dobs of silicone in the channel on the windscreen where the coax sits to hold the cable back from view. This is much betterer than what I had before
THe two dark spots is the silicone
Much neater.


Comment